 They’re healthy, they’re satisfying, they’re customizable, and they’re everywhere in California. Acai (a-sigh-E) bowls are trending big time and no one seems to be complaining. It’s for good reason as these filling bowls are quick and accessible, appeal to the health-conscious mind and as a bonus, make for some pretty good photo opportunities. Continue reading
Tag Archives: homemade
Peanut Butter Chocolate Chip Cookies
 I got my wish last weekend of enjoying some cold weather and staying cozy at home. The rain came on Sunday, which was even more perfect so I gathered up all my baking items necessary to bake this recipe I found via Cupcakes and Cashmere. Continue reading
Christmas Candles DIY

Happy Friday before Christmas! With the last weekend of shopping fast approaching, the stores, malls, and streets will be jam-packed with people. If you want to avoid lines and save money (!) – here is a fun, super cute DIY project that I think is perfect for Christmas presents. Continue reading
Homemade Clothesline
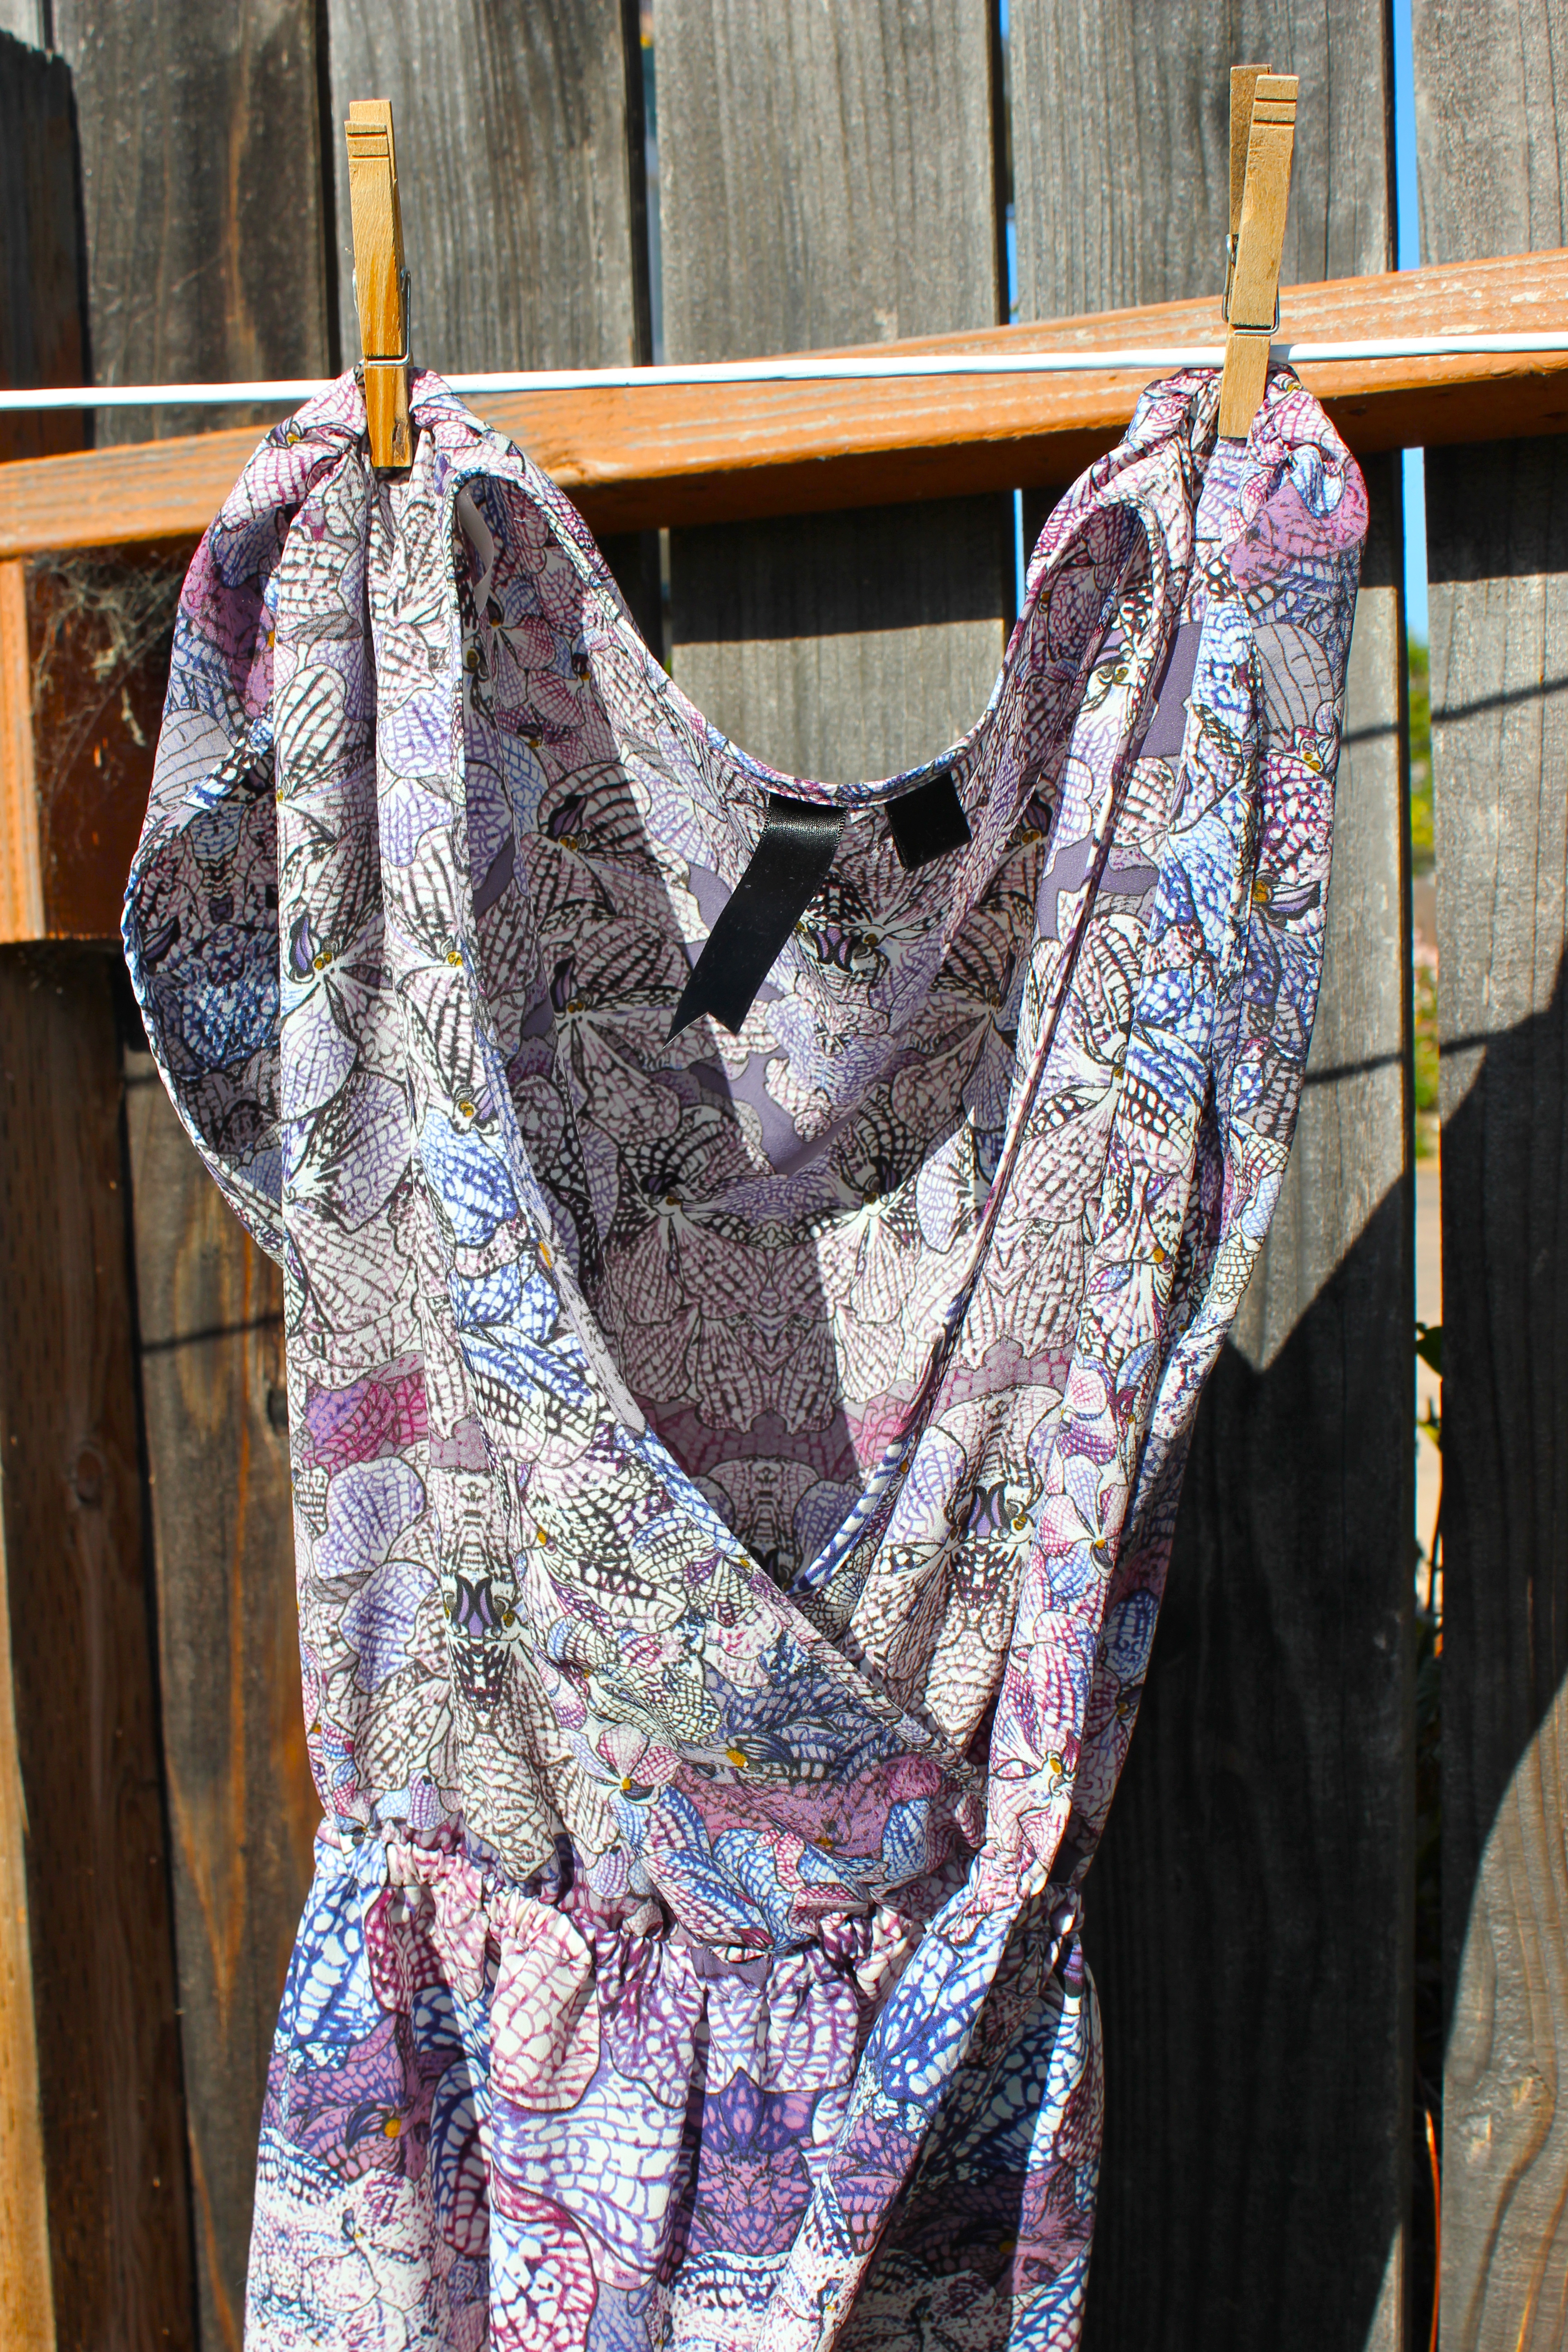
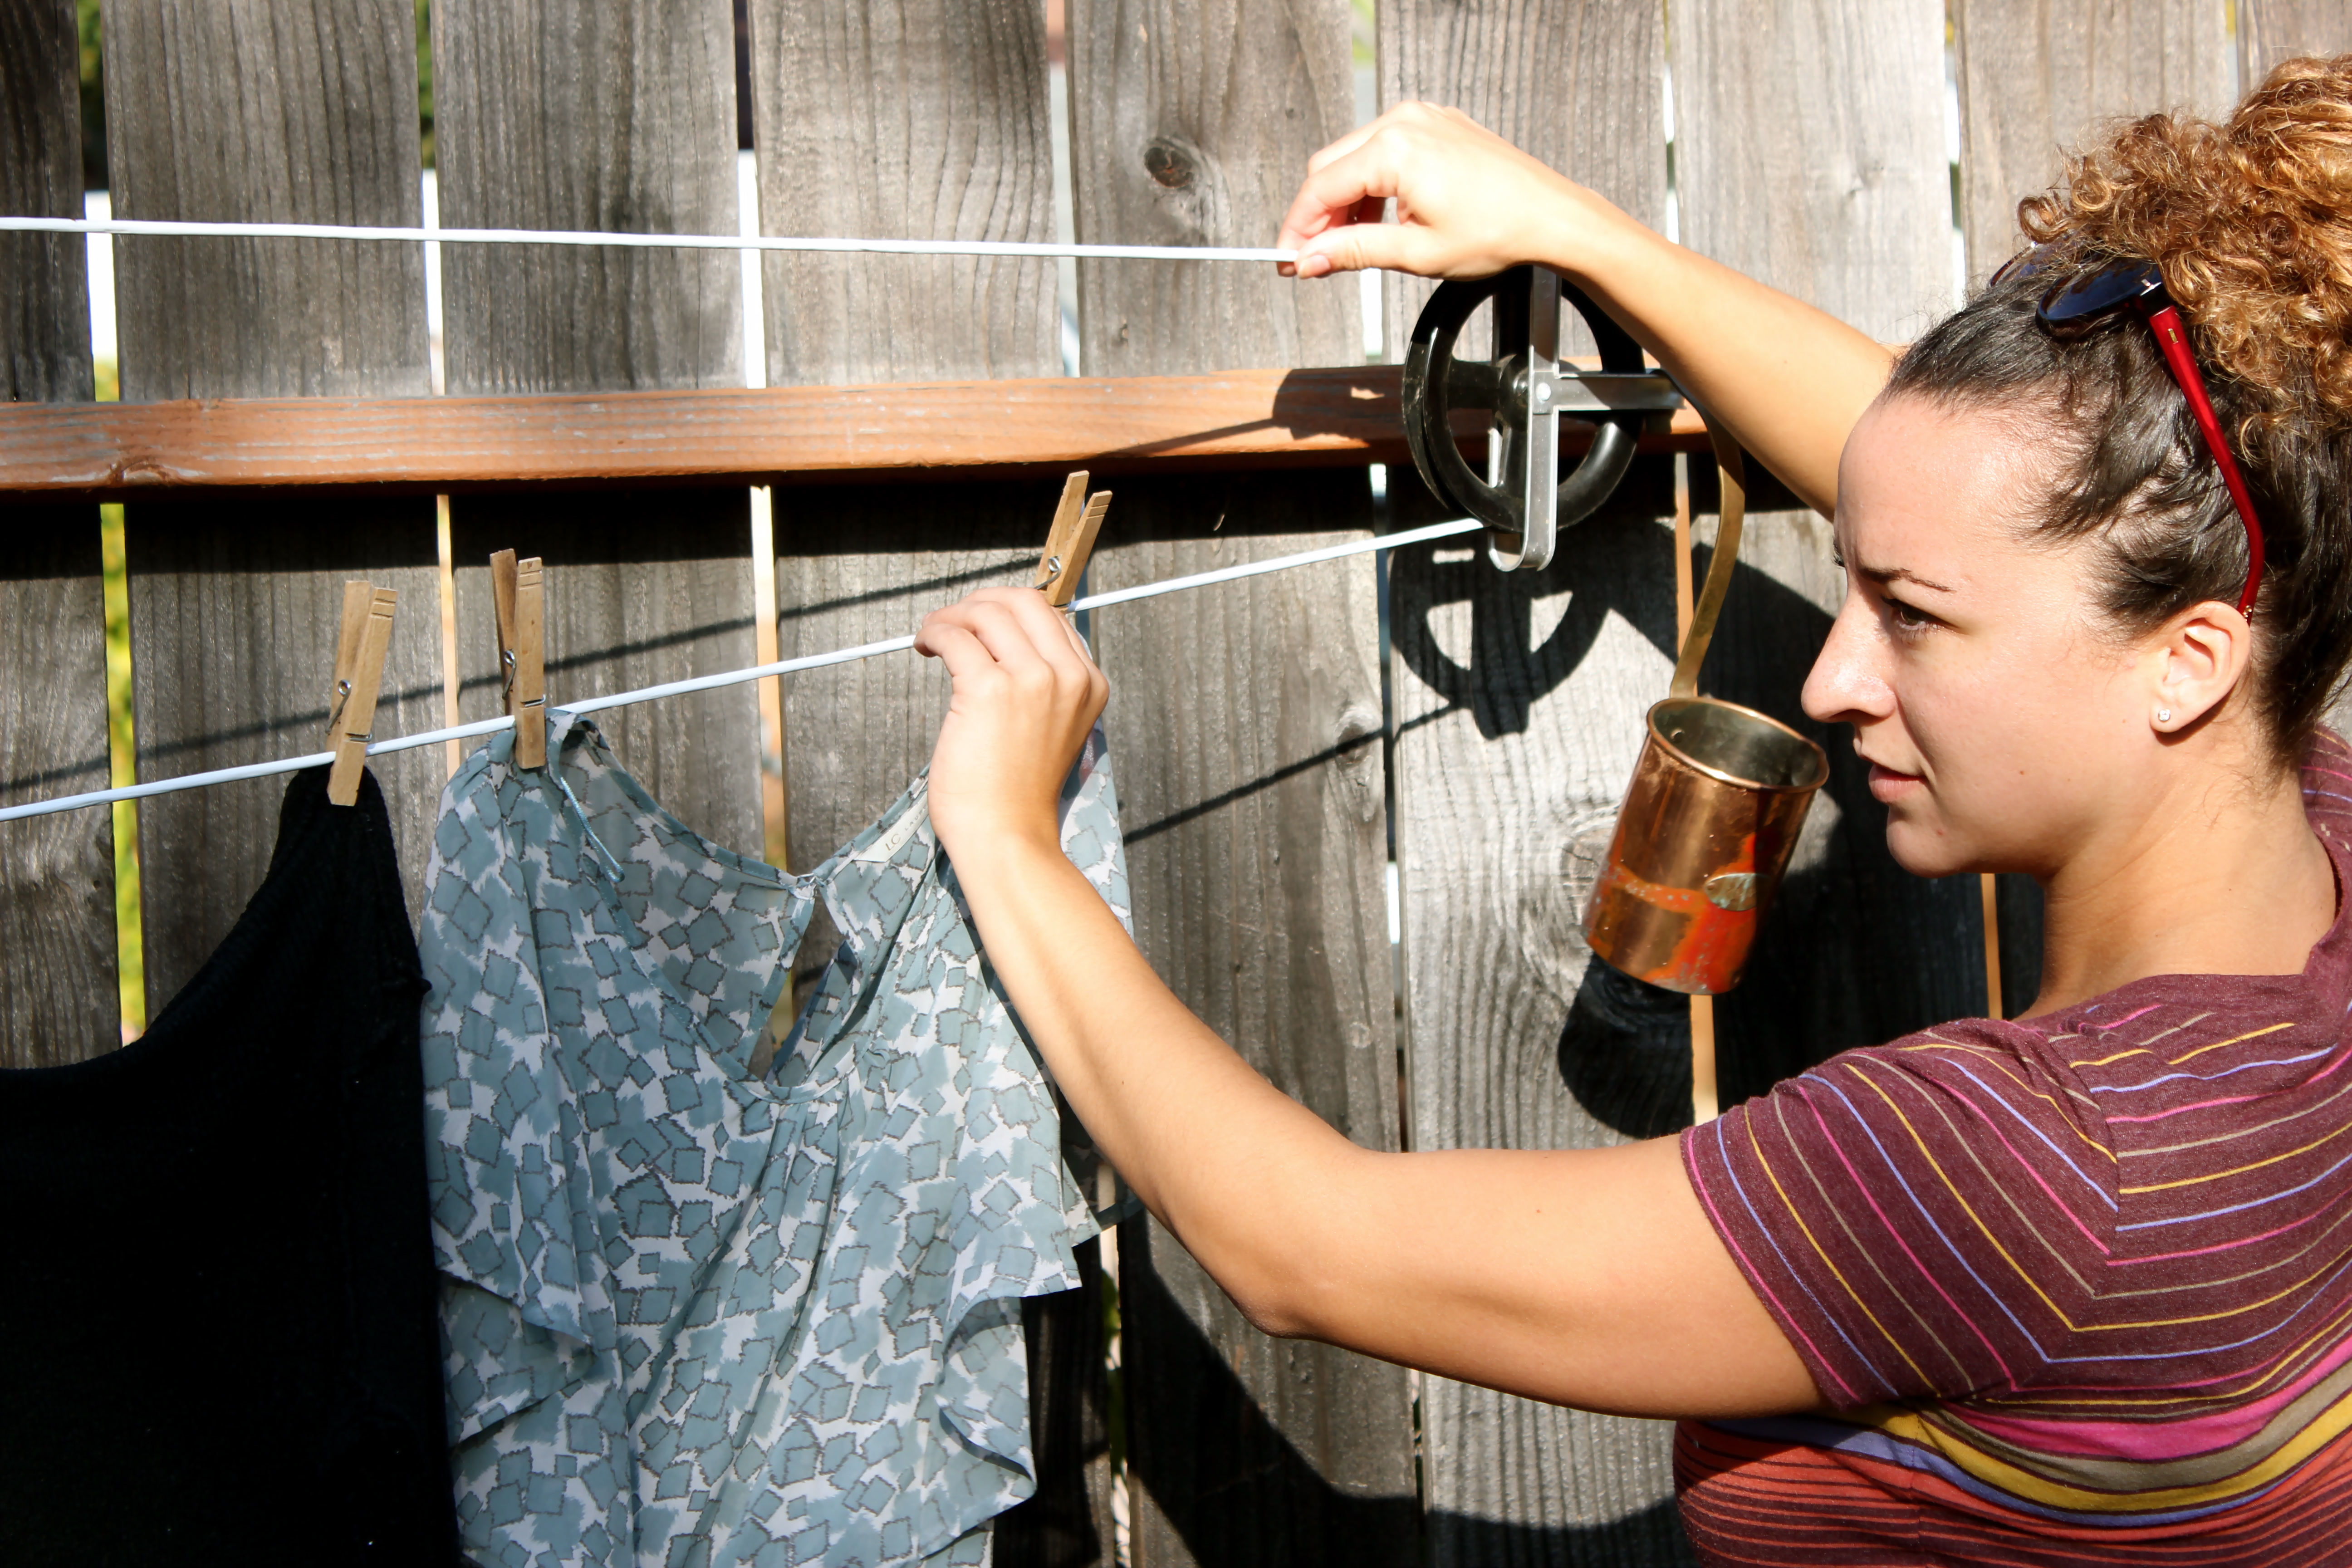
Although summer and its heat are leaving us until next year, it won’t stop me from hanging my clothes out to dry. This practice was instilled in me when I was barely learning how to do my own laundry. My mom would express the importance of hanging your ‘intimates,’ even though my intimates in HS were basically only bras. As I’ve grown older, I’ve come to realize the importance of hanging most all my clothes to dry from jeans and sweaters to intimates. Although I’m very well versed and have made this practice a habit, I still need to get significantly better at making trips to the dry cleaners…In the meantime, I’ve noticed a big difference in the longevity and durability of my clothes. I think it’s important for most people to get into this habit, especially if you’ve veered from the $20 Forever21 items to the $75 and higher say, Free People, style :). I realize not all of you may have the luxury of mostly sunny days throughout the winter, so use an inside rack until the weather warms up. I made this clothesline last year, and it’s been awesome ever since. Thanks Martha!


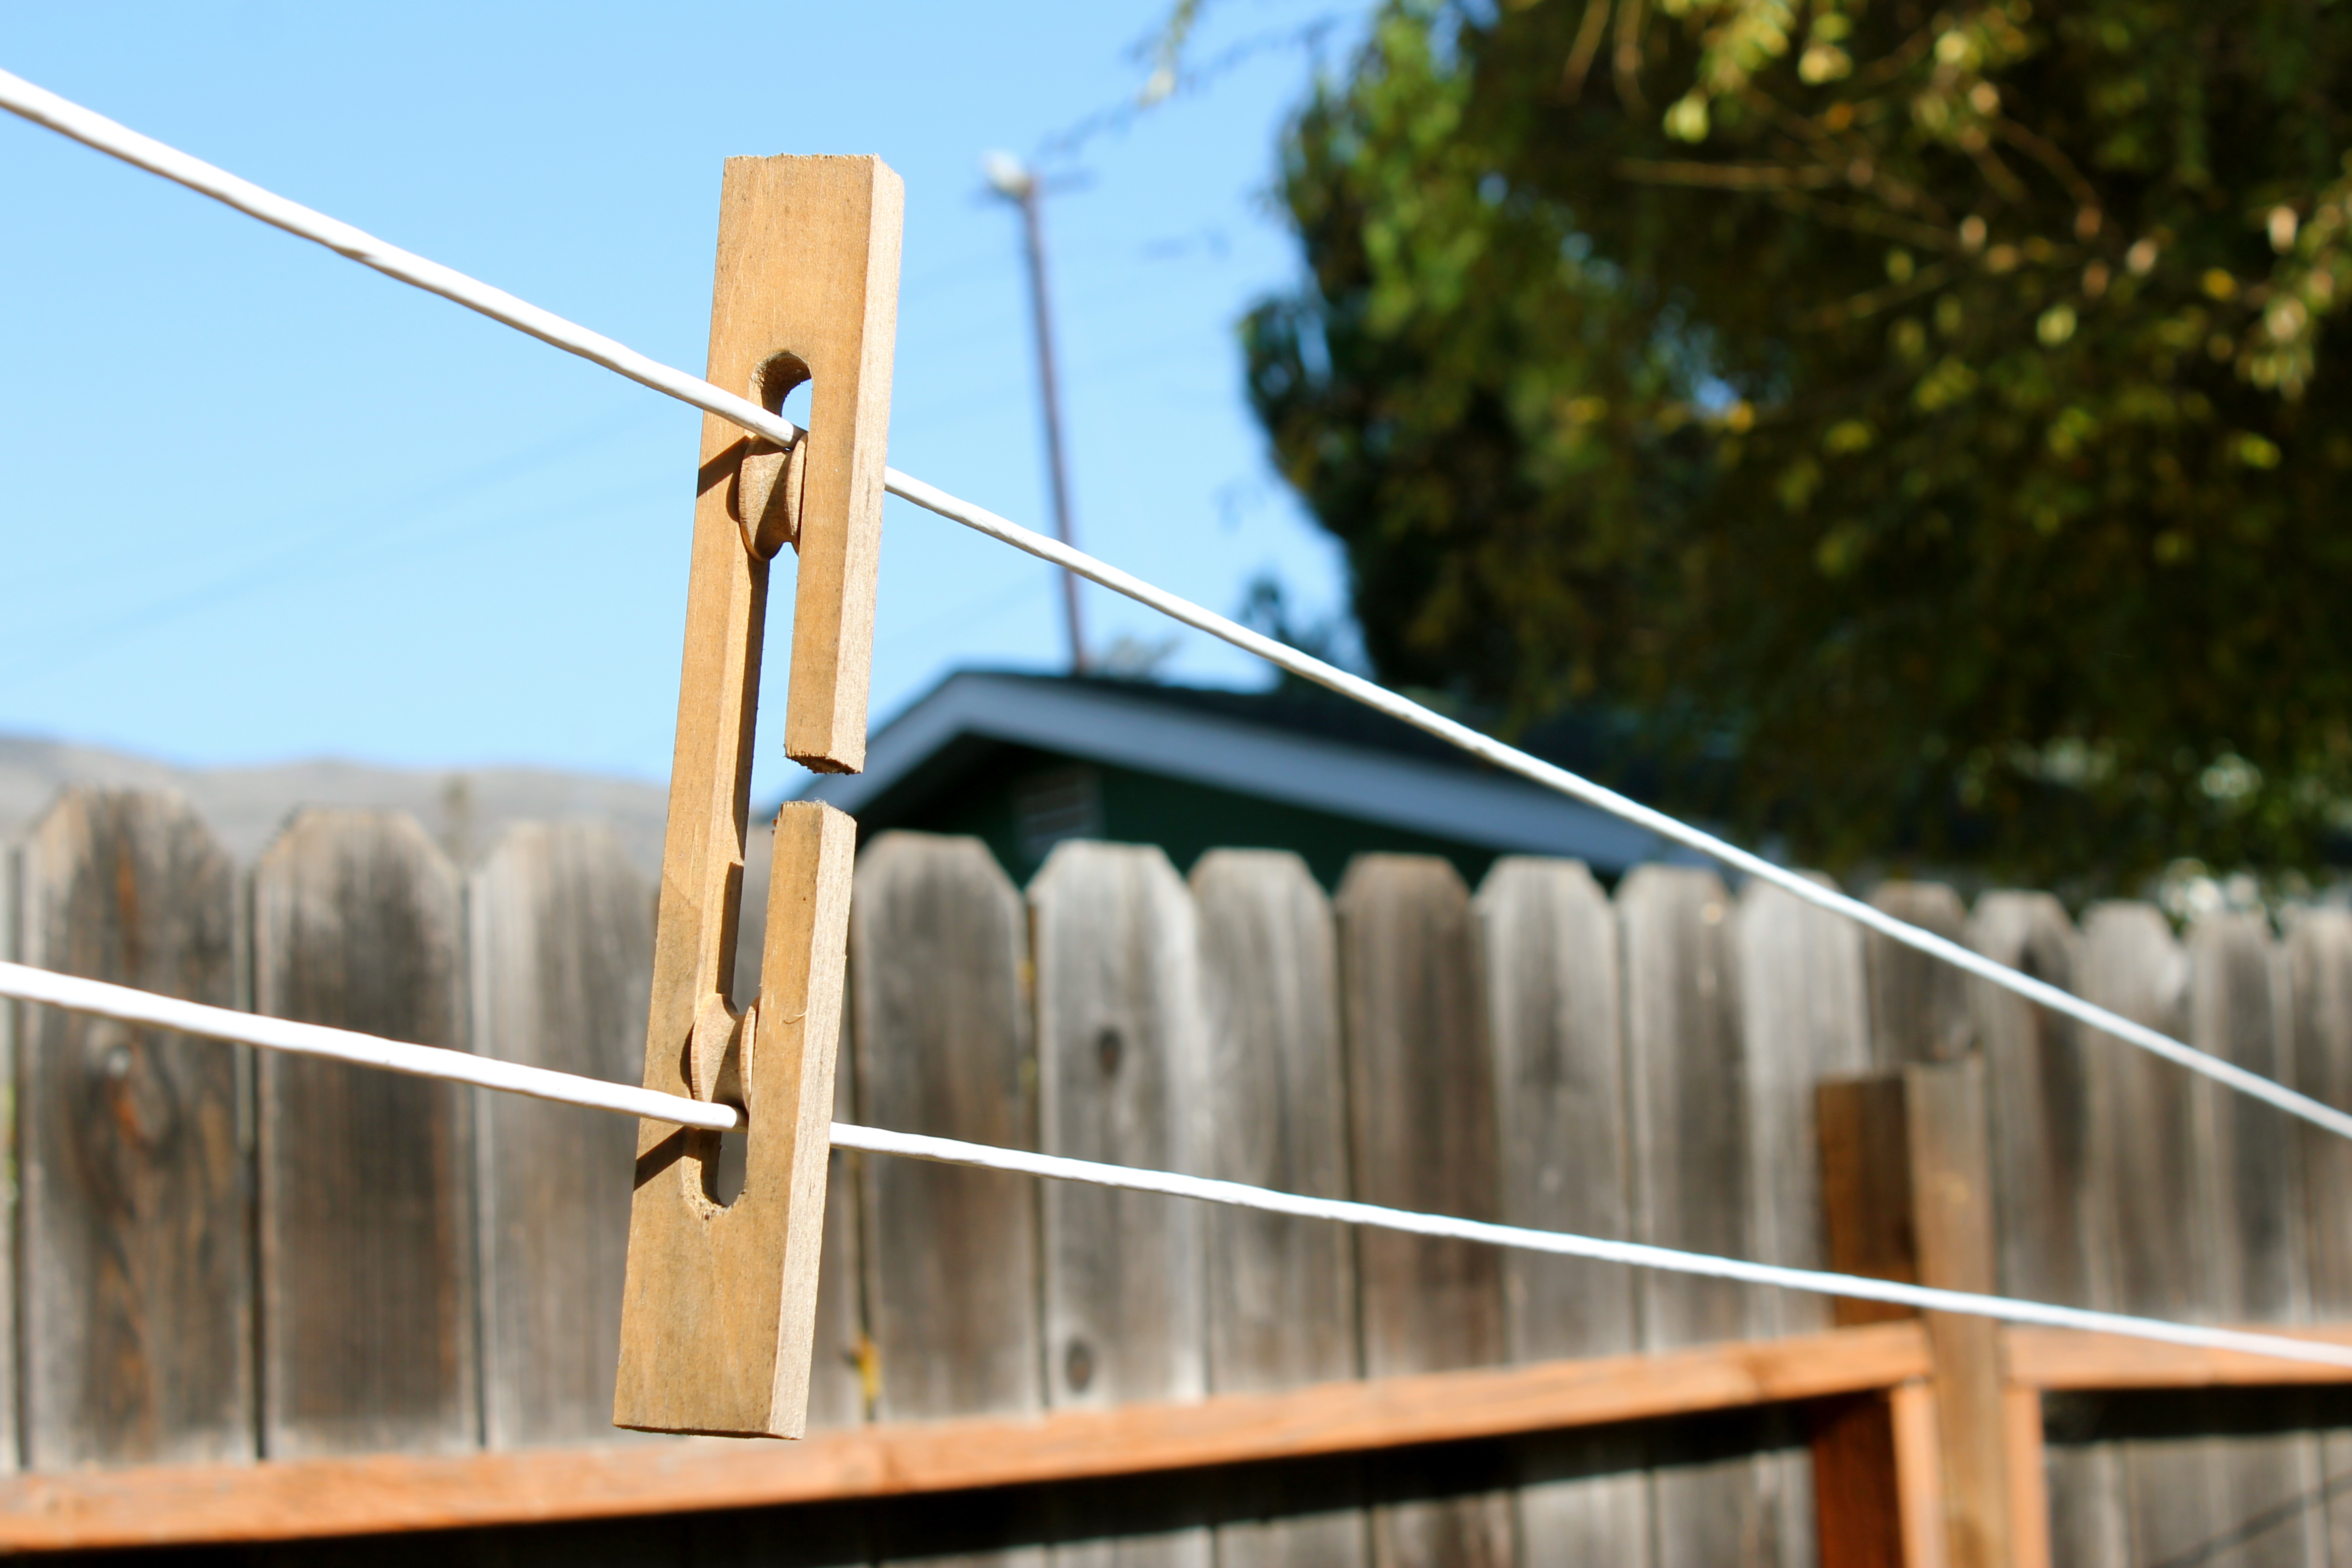 The construction of this clothesline is very affordable and quite easy. All of the components can be found at your local hardware store.
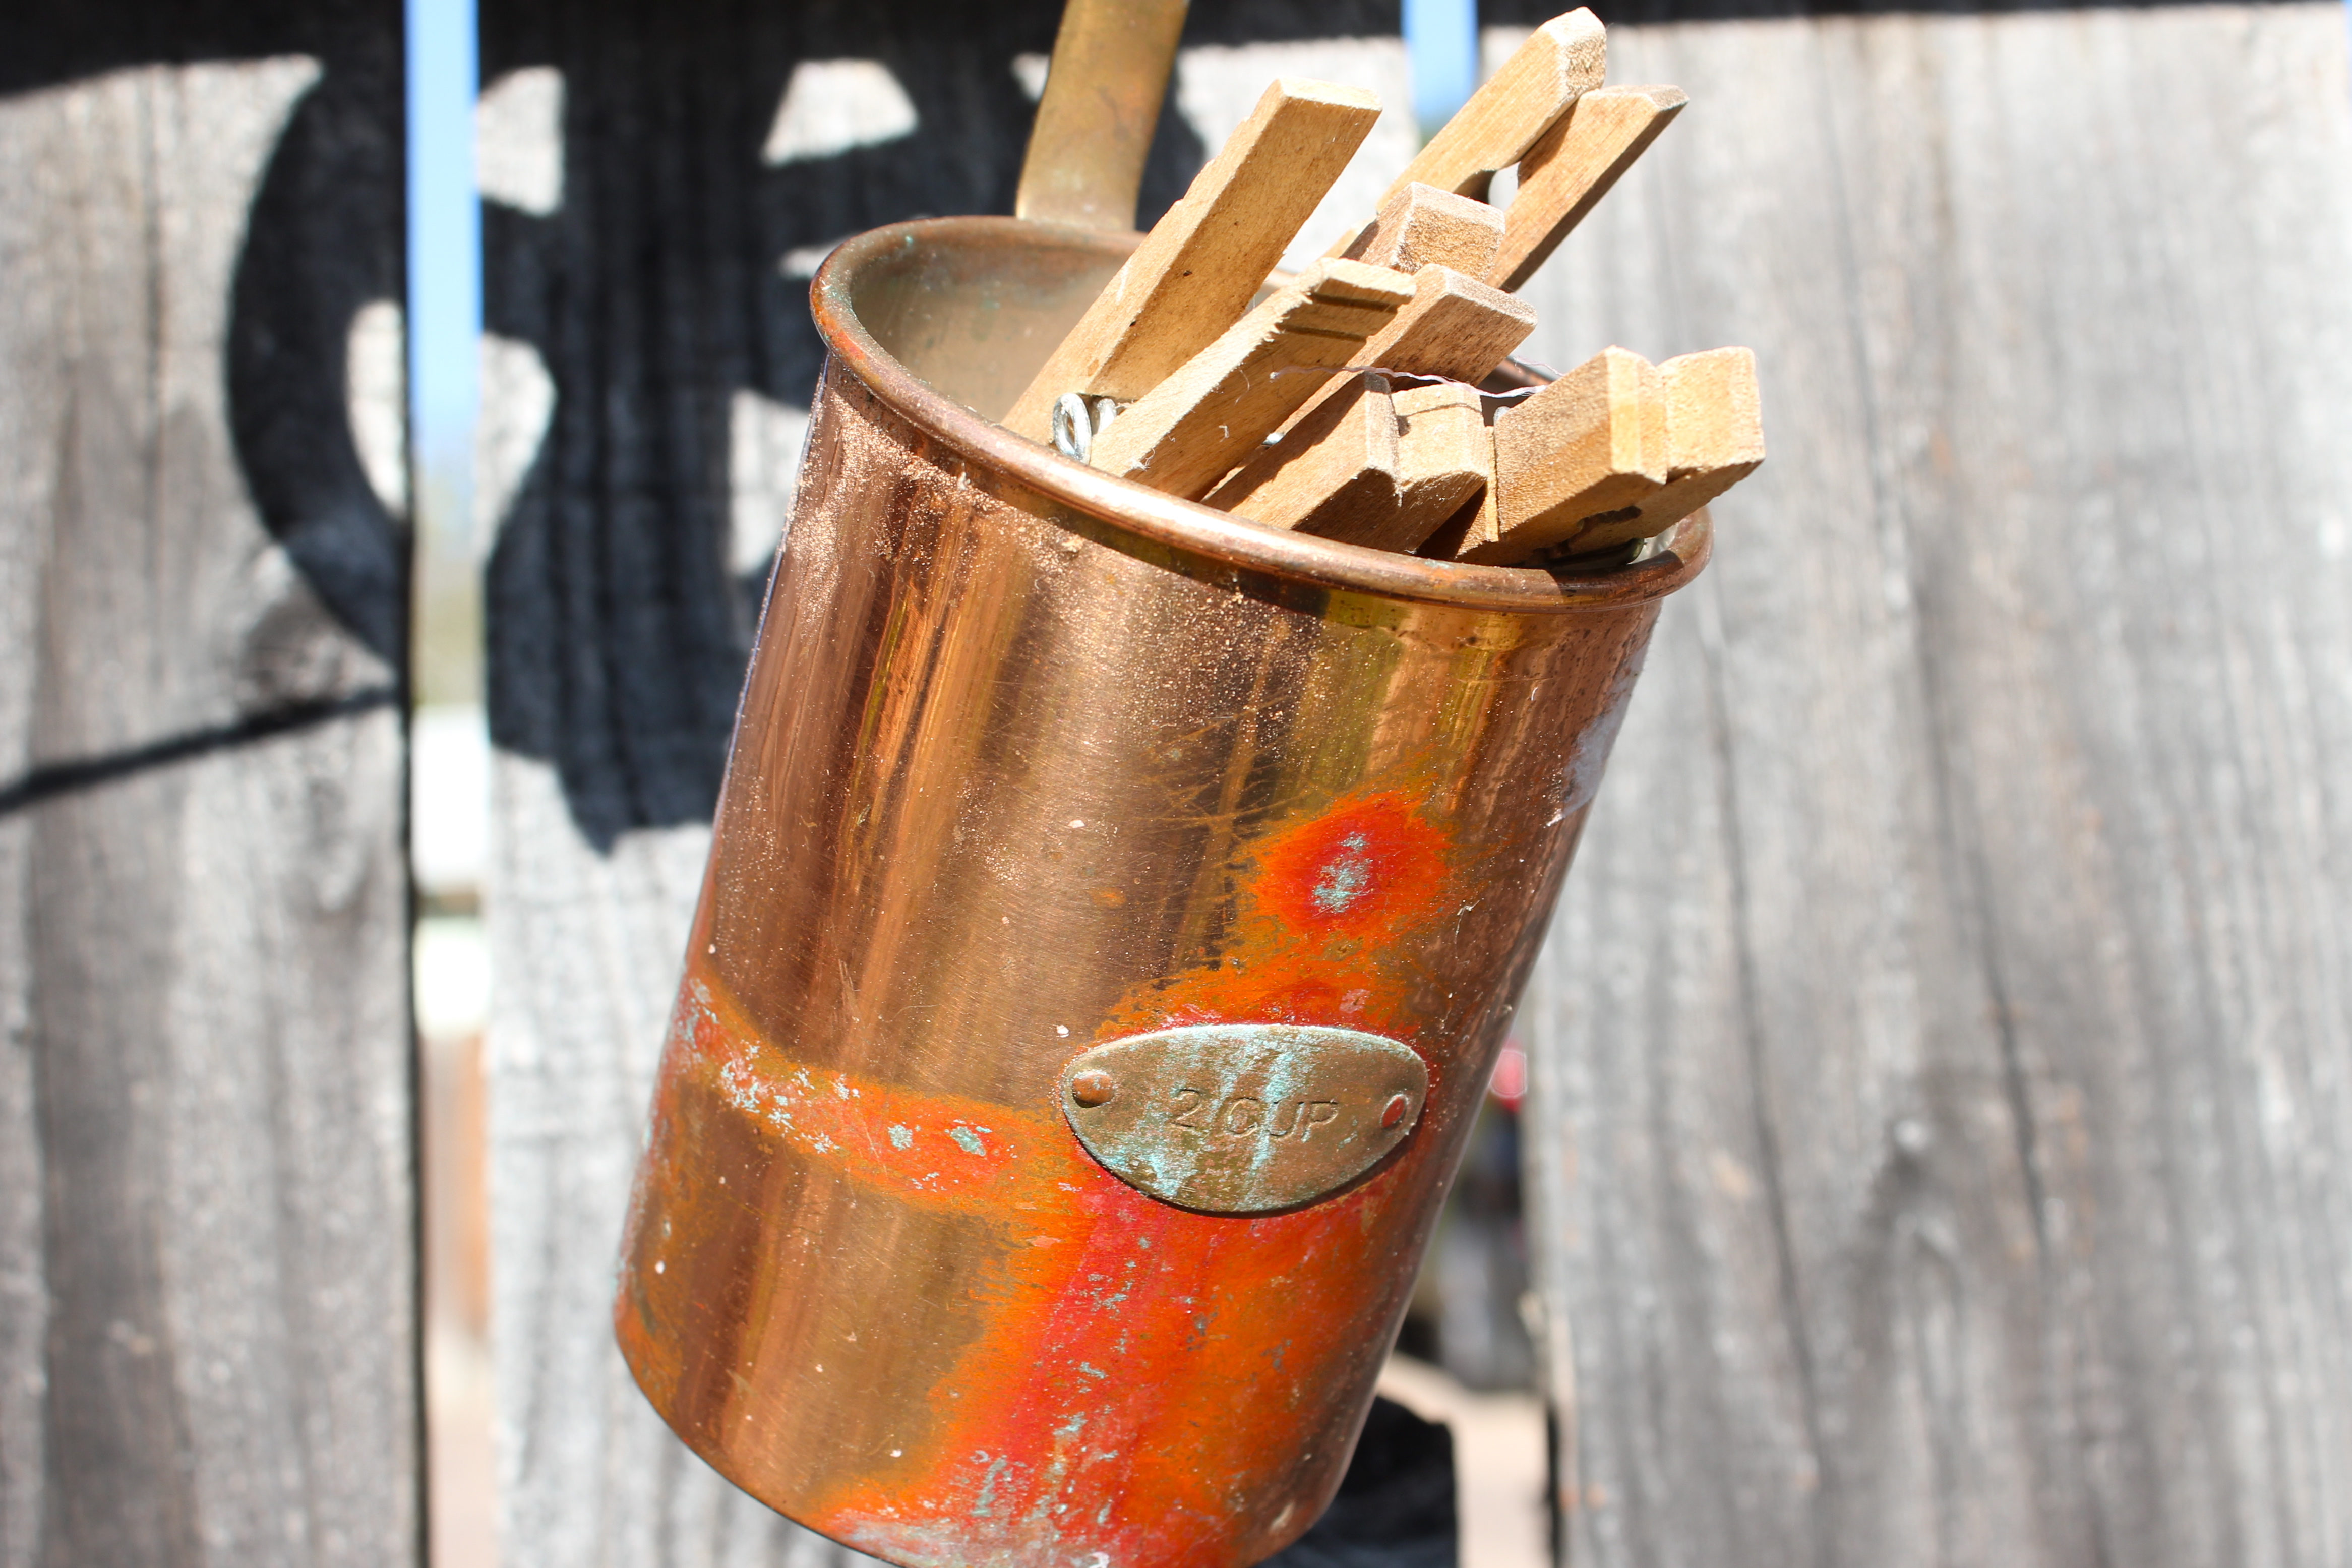 I found this measuring cup at an antique store and had to buy it for the $2 they were asking. I finally found the perfect use for it!
 Hope you and your clothes will enjoy this nice and semi-peaceful treatment. You’ll love the way your clothes smell fresh and light!
Cheers! -L
Chevron Card
Chevron pattern is all the rage right now. It’s on rugs, pillows, purses, dresses, painted on walls, and much more. While contemplating a “Thank You” card design, I decided to make a chevron themed thank you card. After looking in my suitcases, I had all the necessary supplies to create a beautiful, sparkly, classy card.
~What You’ll Need~
~ Ribbon of any color or design ~ Scissors ~ Hot glue gun ~ A blank card ~ Glue Pen ~ Glitter

After you have all your supplies together, measure an equal distance from the top and bottom of the card towards the middle, so your chevron lines are equal. I measured an inch and a half. Mark your lines, and place your ribbon on the mark, then mark lines on the ribbon, so you know where to cut.


Cut your first ribbon section. To follow an even, easy to put together pattern, flip over the first section (using it as a stencil), lay it over the front of the ribbon and cut. After you’ve cut enough pieces to reach the end of the card, lay them out making sure they fit together.


Grab your glue pen, and write the theme of the card, in my case, it was Thank You. Pour over the glitter, and wait 3-5 minutes before removing the glitter. Shake it off, and gently rub the remainder glitter off the card.


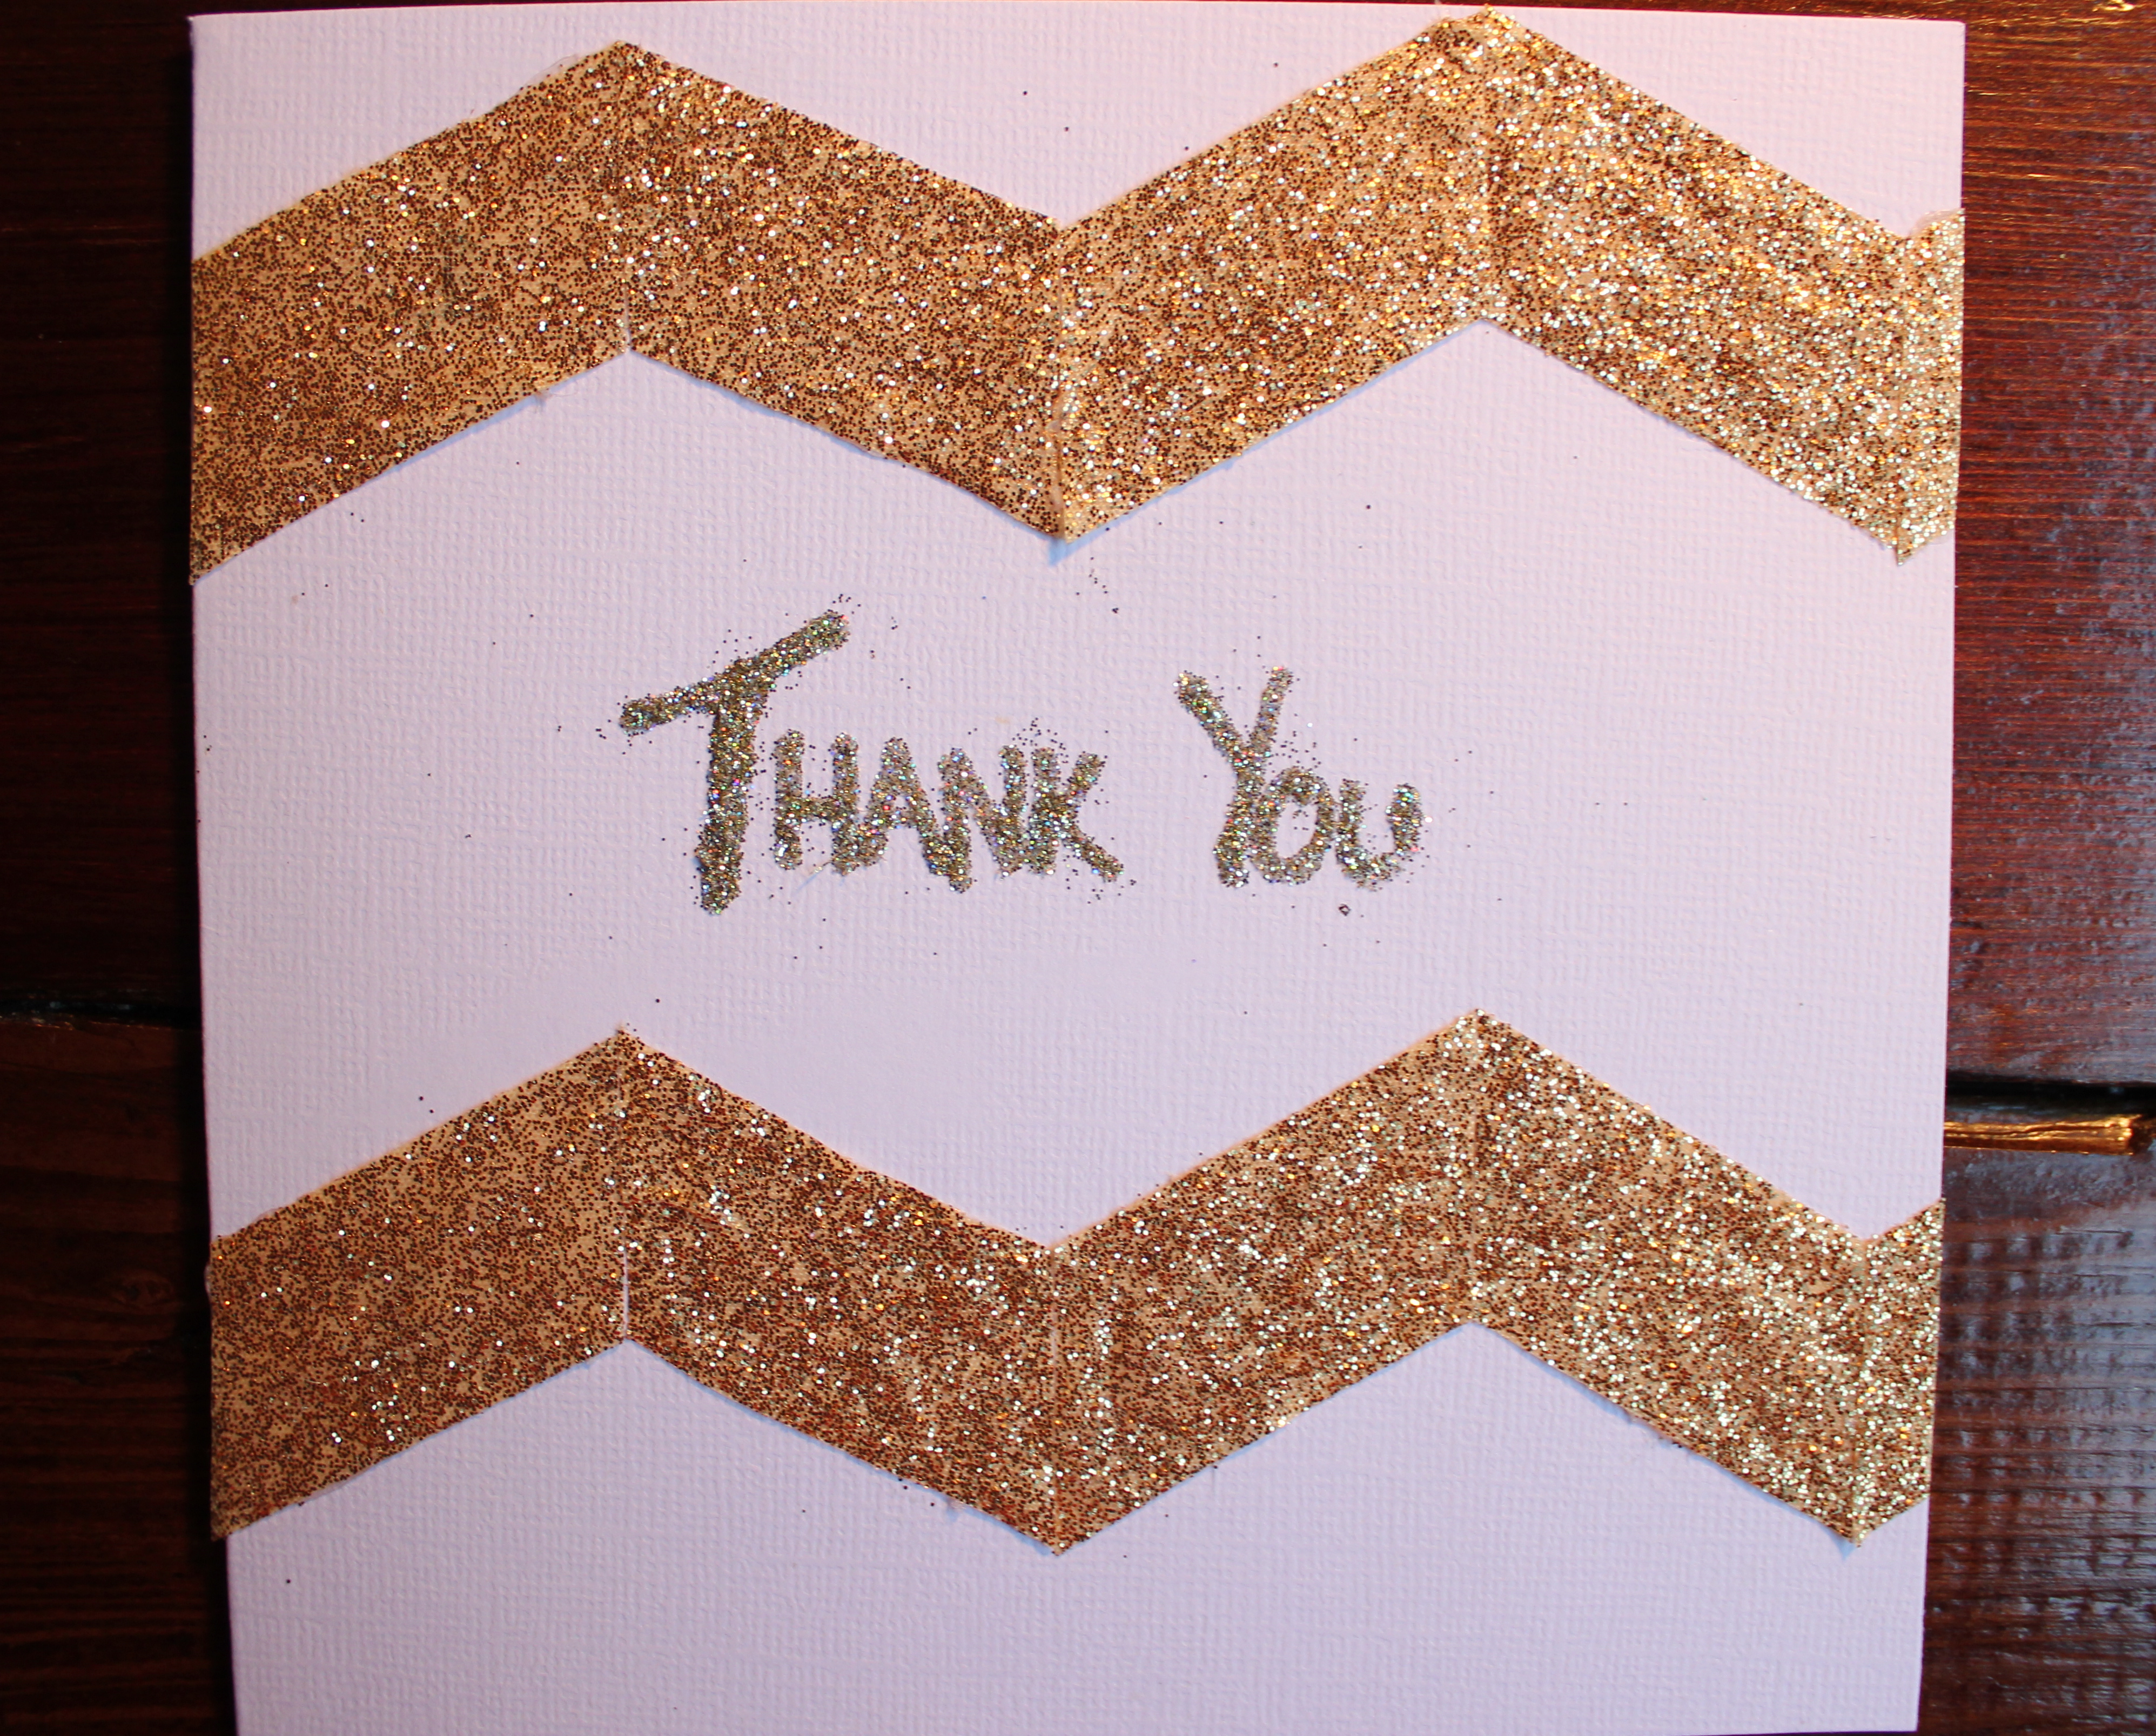
In the end, you’ll have a great card that was worth the effort to make. Whoever is receiving it, will love the thought and time it took!

Cheers! -L
Chili Verde
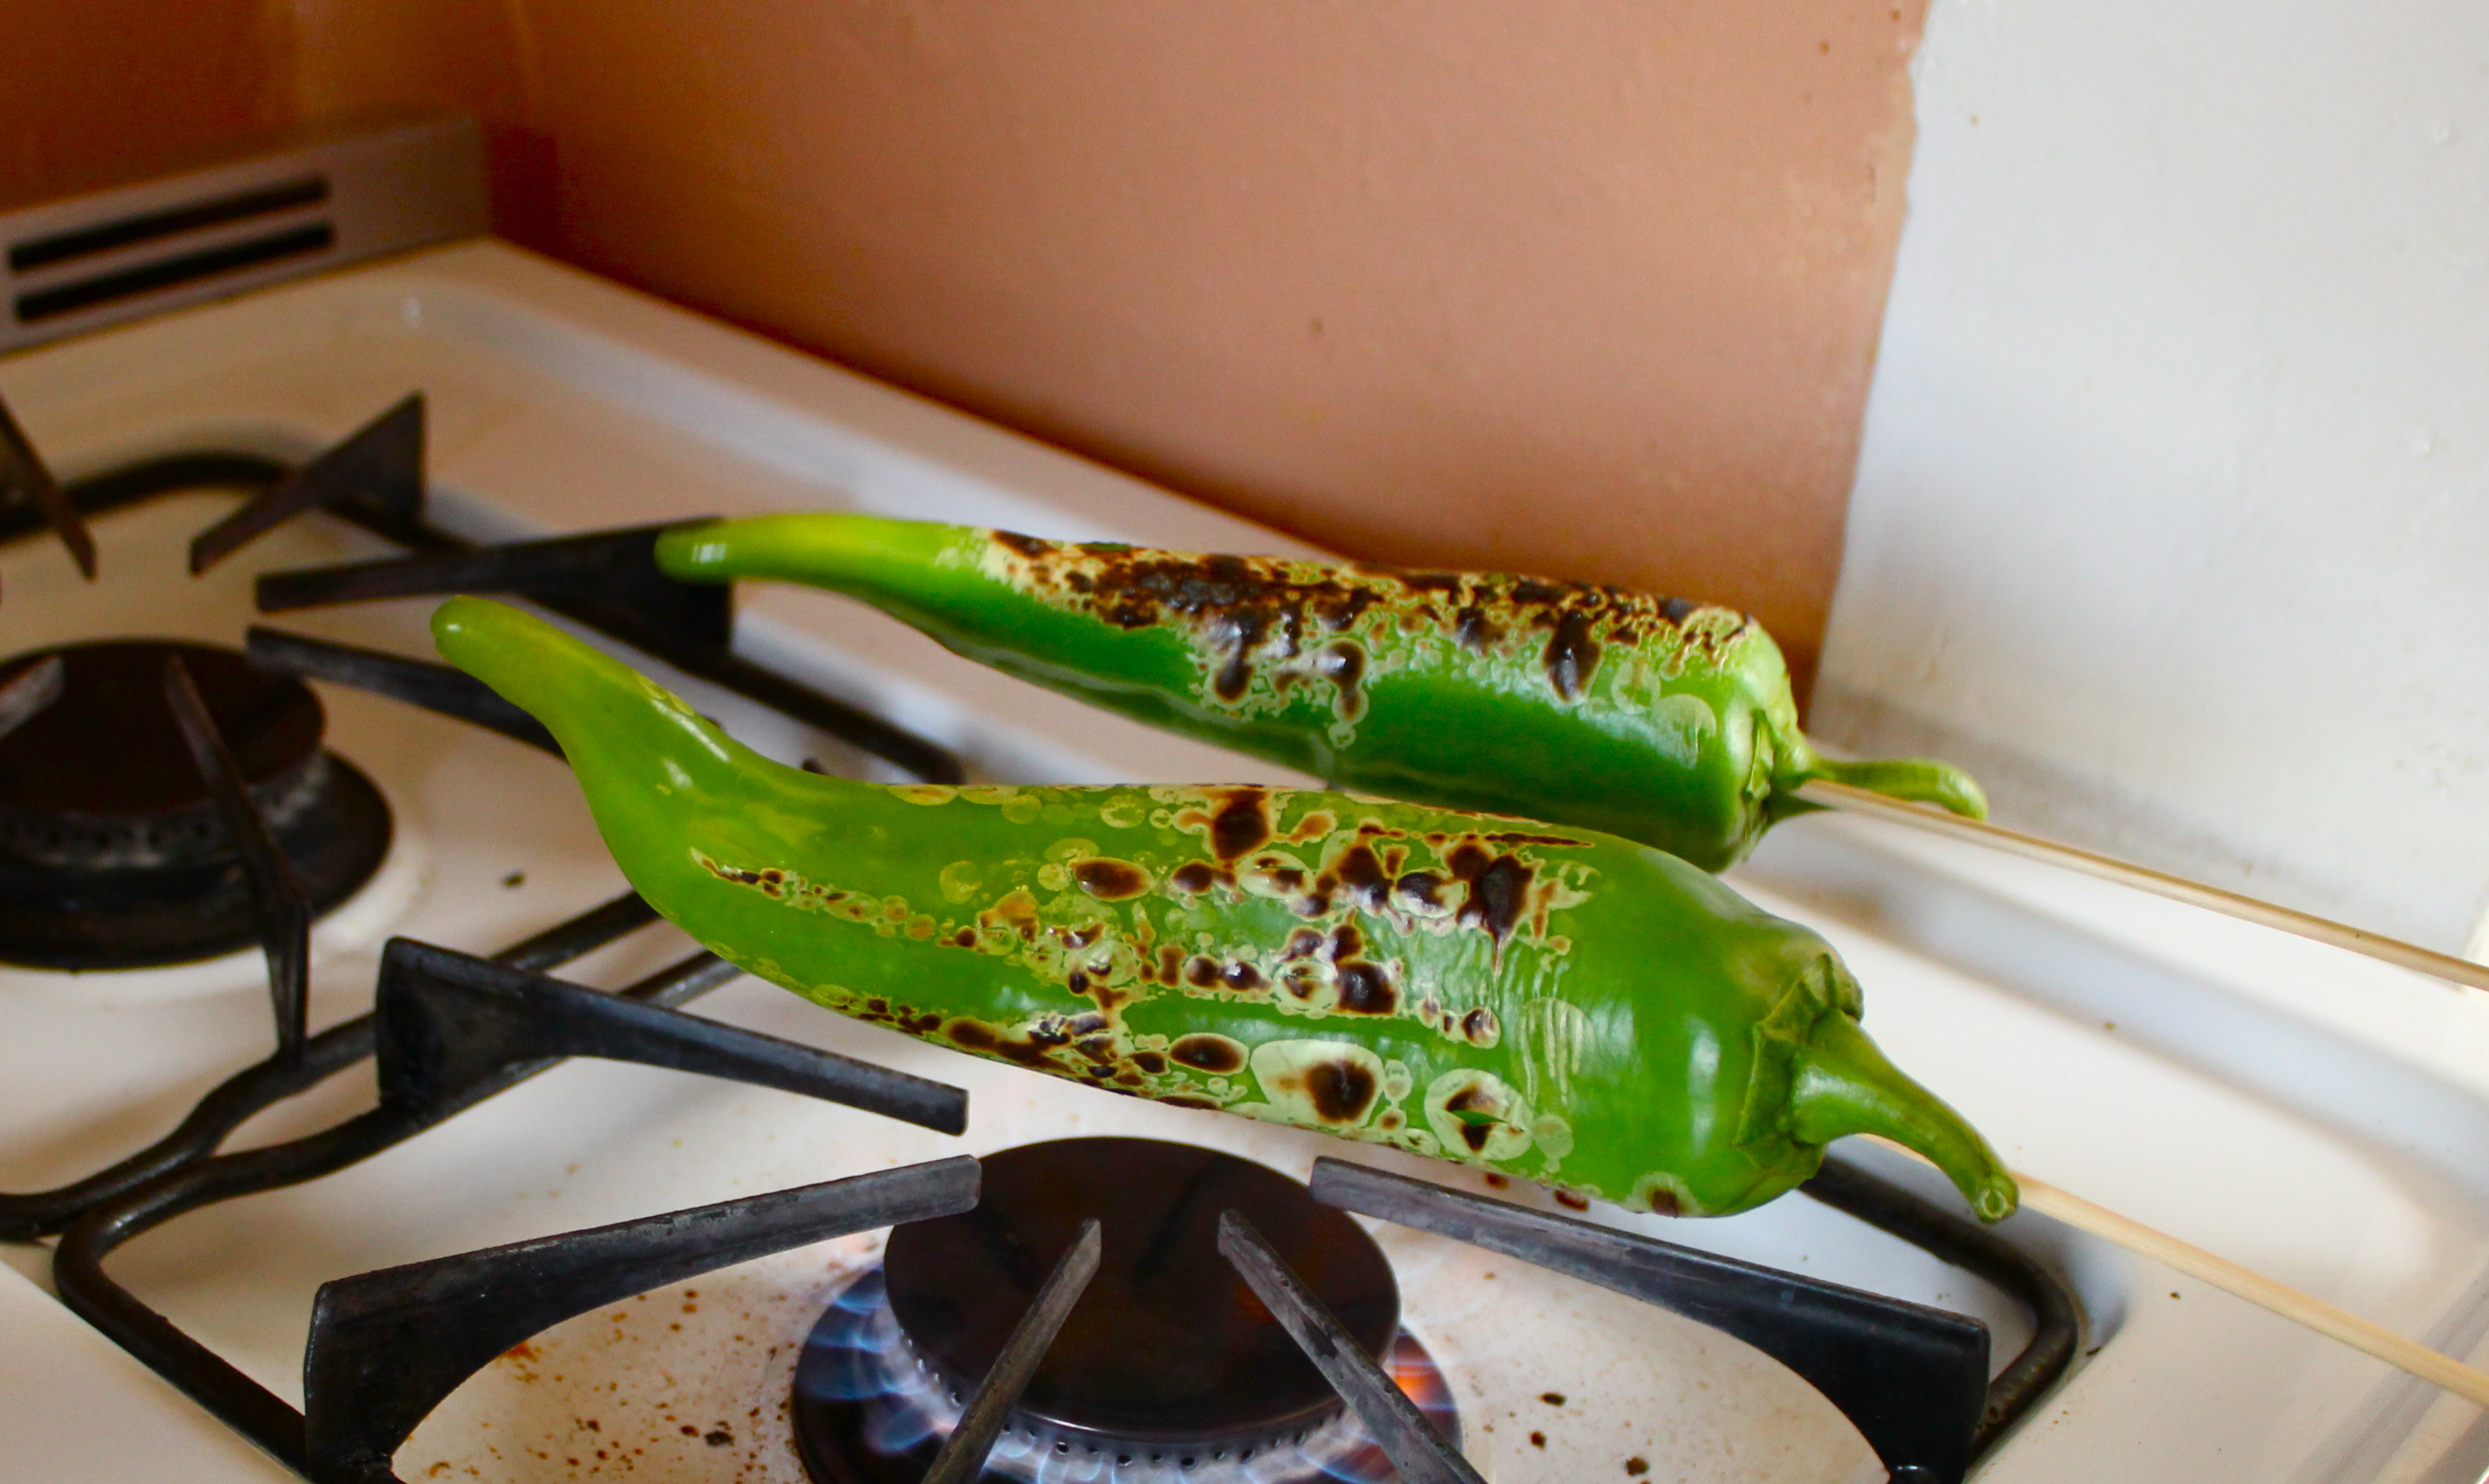
The Garden has produced an abundance of Anaheim Chiles. Eating them on their own are delicious, throwing them in with some Top Ramen (yes, so gourmet) is also quite tasty, but we wanted to do something bigger and better since having so many. Chile Verde was the winner! So, we picked the Anaheims, the Jalapenos, along with cilantro and onions. At the local market we got tomatillos, pork, garlic, chicken broth, heavy cream and lemons.

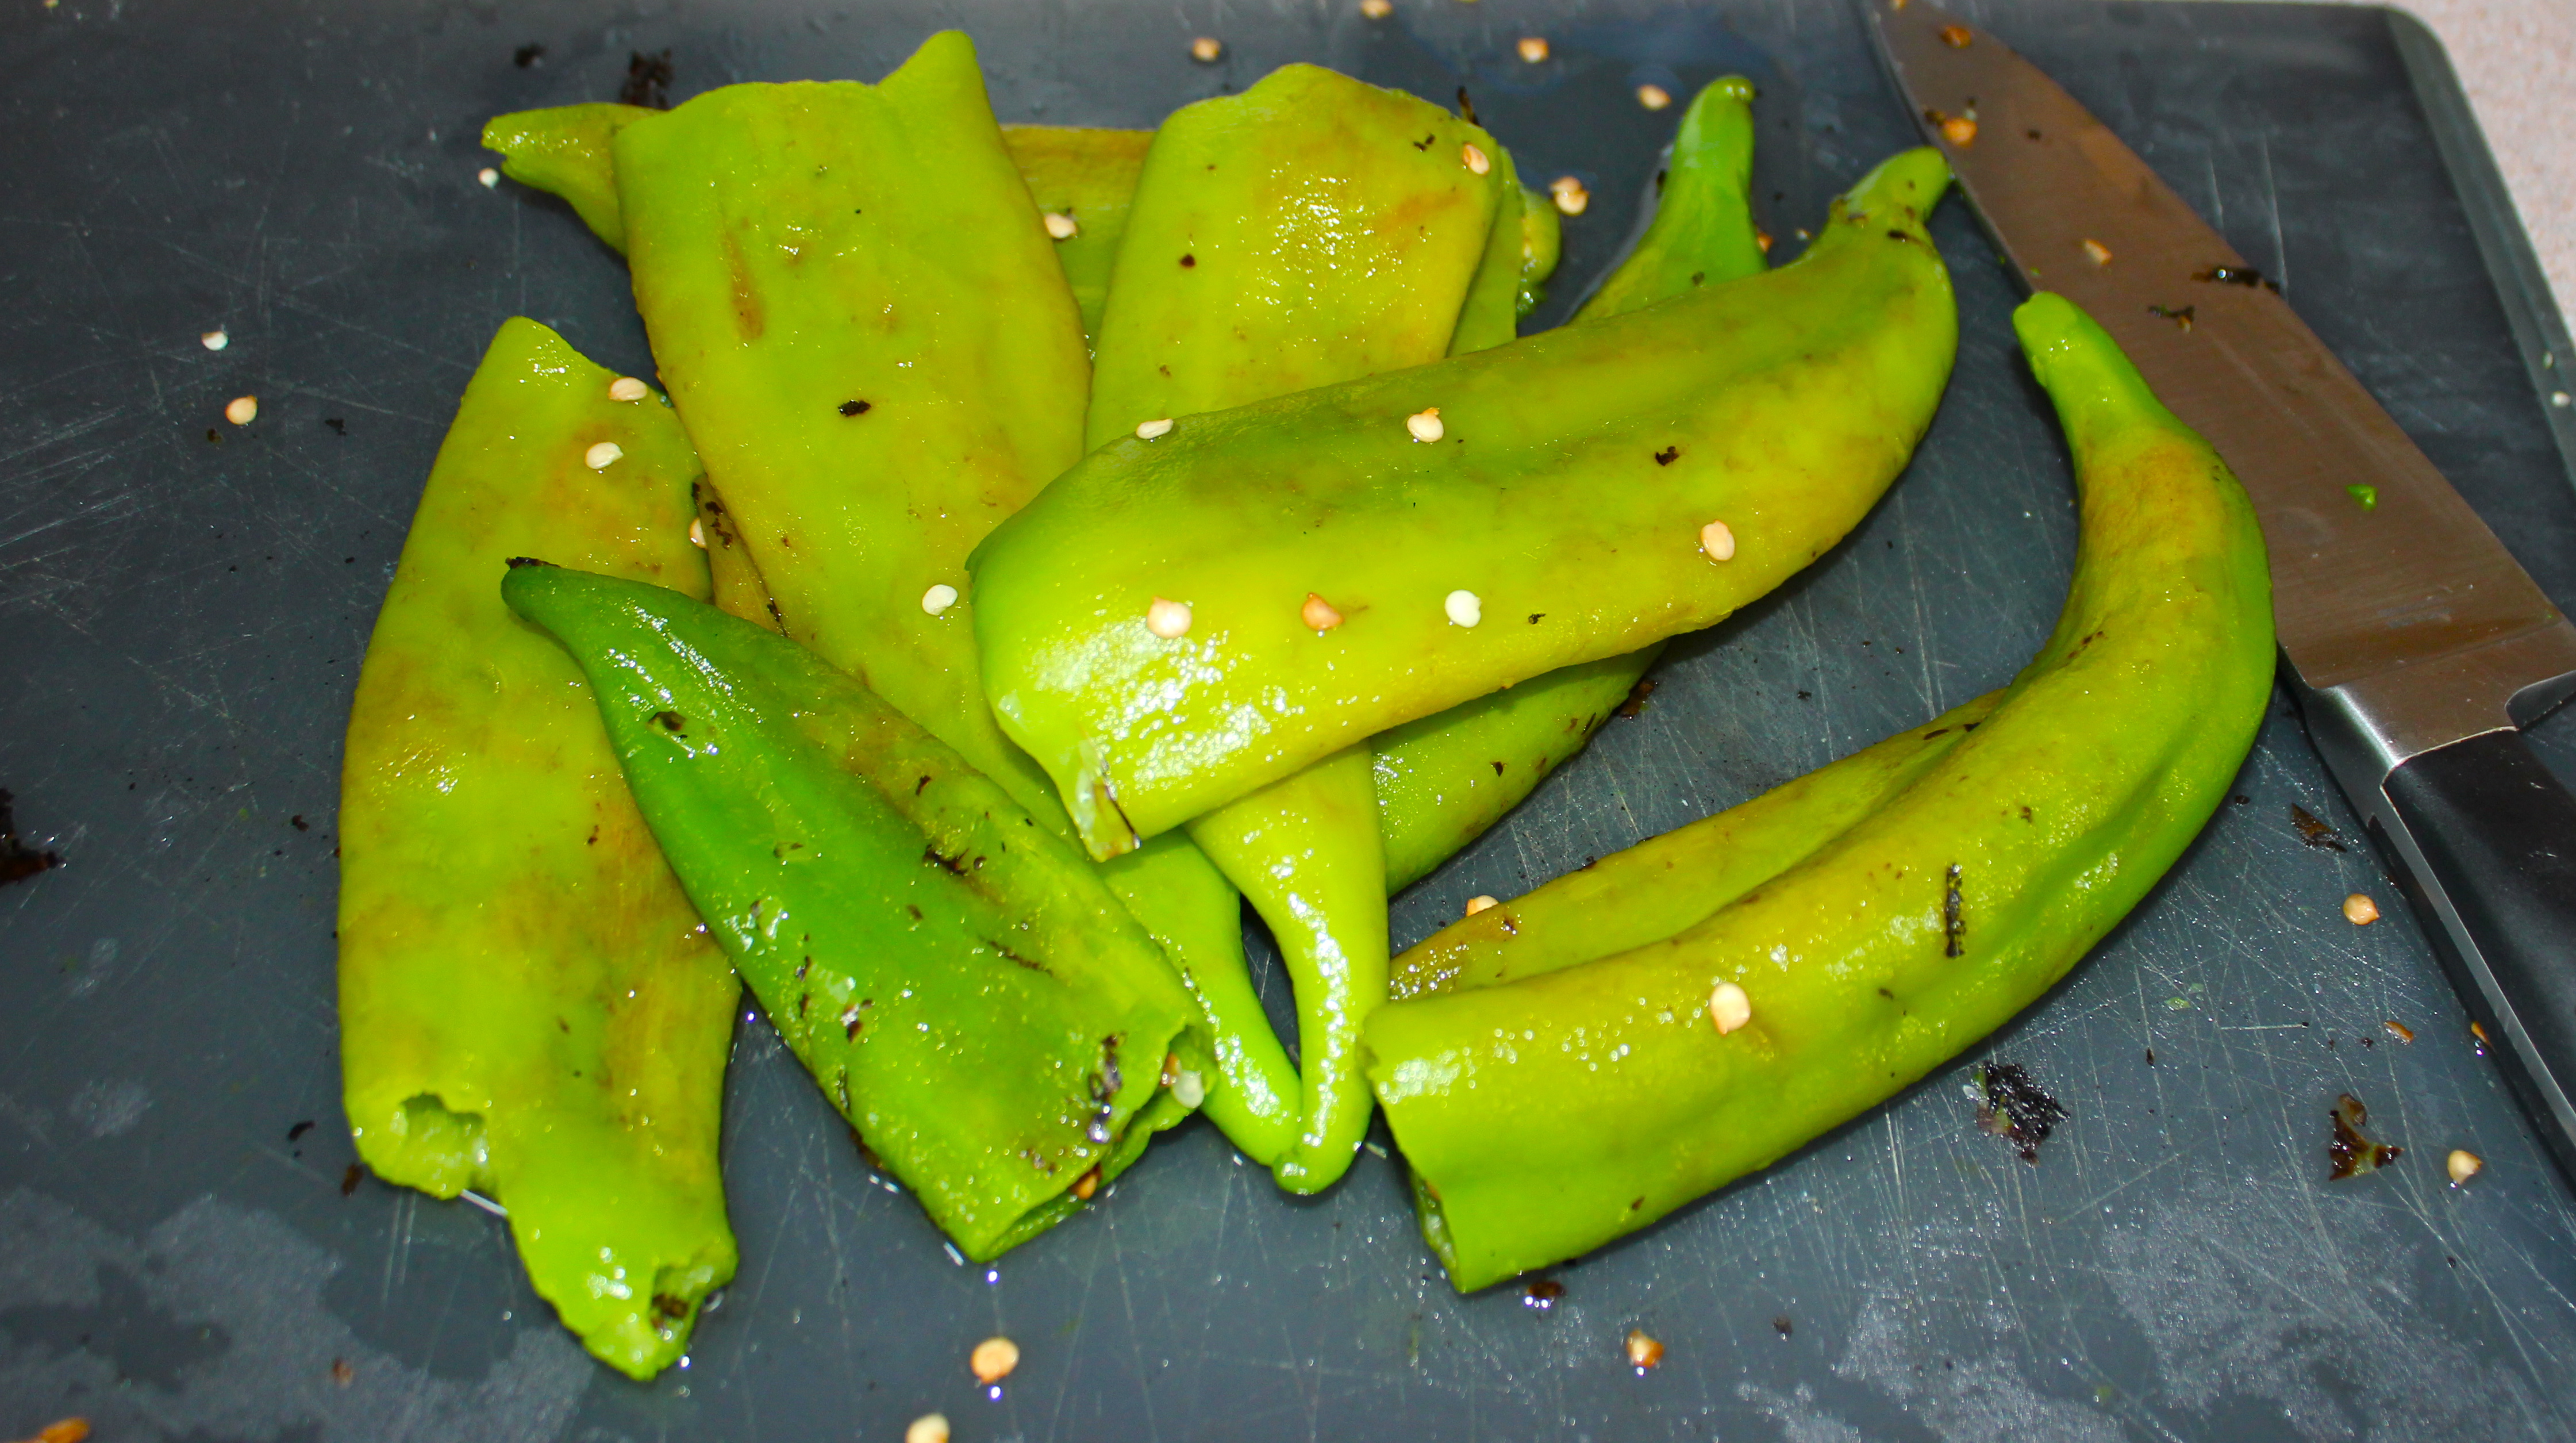
Following recipes is not my forte, all the time. I like to add seasonings, vegetables, and spices that I think may add to the dish. For this chile verde, we seasoned the chicken broth with cumin, paprika, chili powder, lime juice, salt, and pepper, to taste. Skinning the chiles is an important part of this process. For an easy method, roast the chiles on skewers over the open gas stove flame then put them in a paper bag. When they’re all roasted, peel off the skin, give them a quick rinse and they are ready!

Chop all your veggies and throw everything in a large pot filled with an already stewing broth. We used 48 oz of chicken broth and 3 tablespoons of heavy cream. Let this simmer and stew on the stove for a good 5 hours, or until cooked down into a nice, thicker broth. The flavors will completely meld together during this time, making an amazing chile verde.


Serve with white rice, refried beans, and corn tortillas. Enjoy!
Cheers! -L
