
String Art is becoming more and more prevalent in décor. From coffee shops, consignment stores and Free People storefronts, the string art trend is growing. Actually, one of my very first posts here on Bloom and Birch was a DIY String Art project – one of my faves to this day. My friend recently had a baby and they wanted to wait until birth for the gender reveal. Since I wasn’t able to give them an entirely (gender) personal baby shower gift, after they birthed their angel boy, Levi – I went to work to create this string art nameplate for the little man! String art is actually quite easy if you have the necessary tools, time and patience!
What You’ll Need:
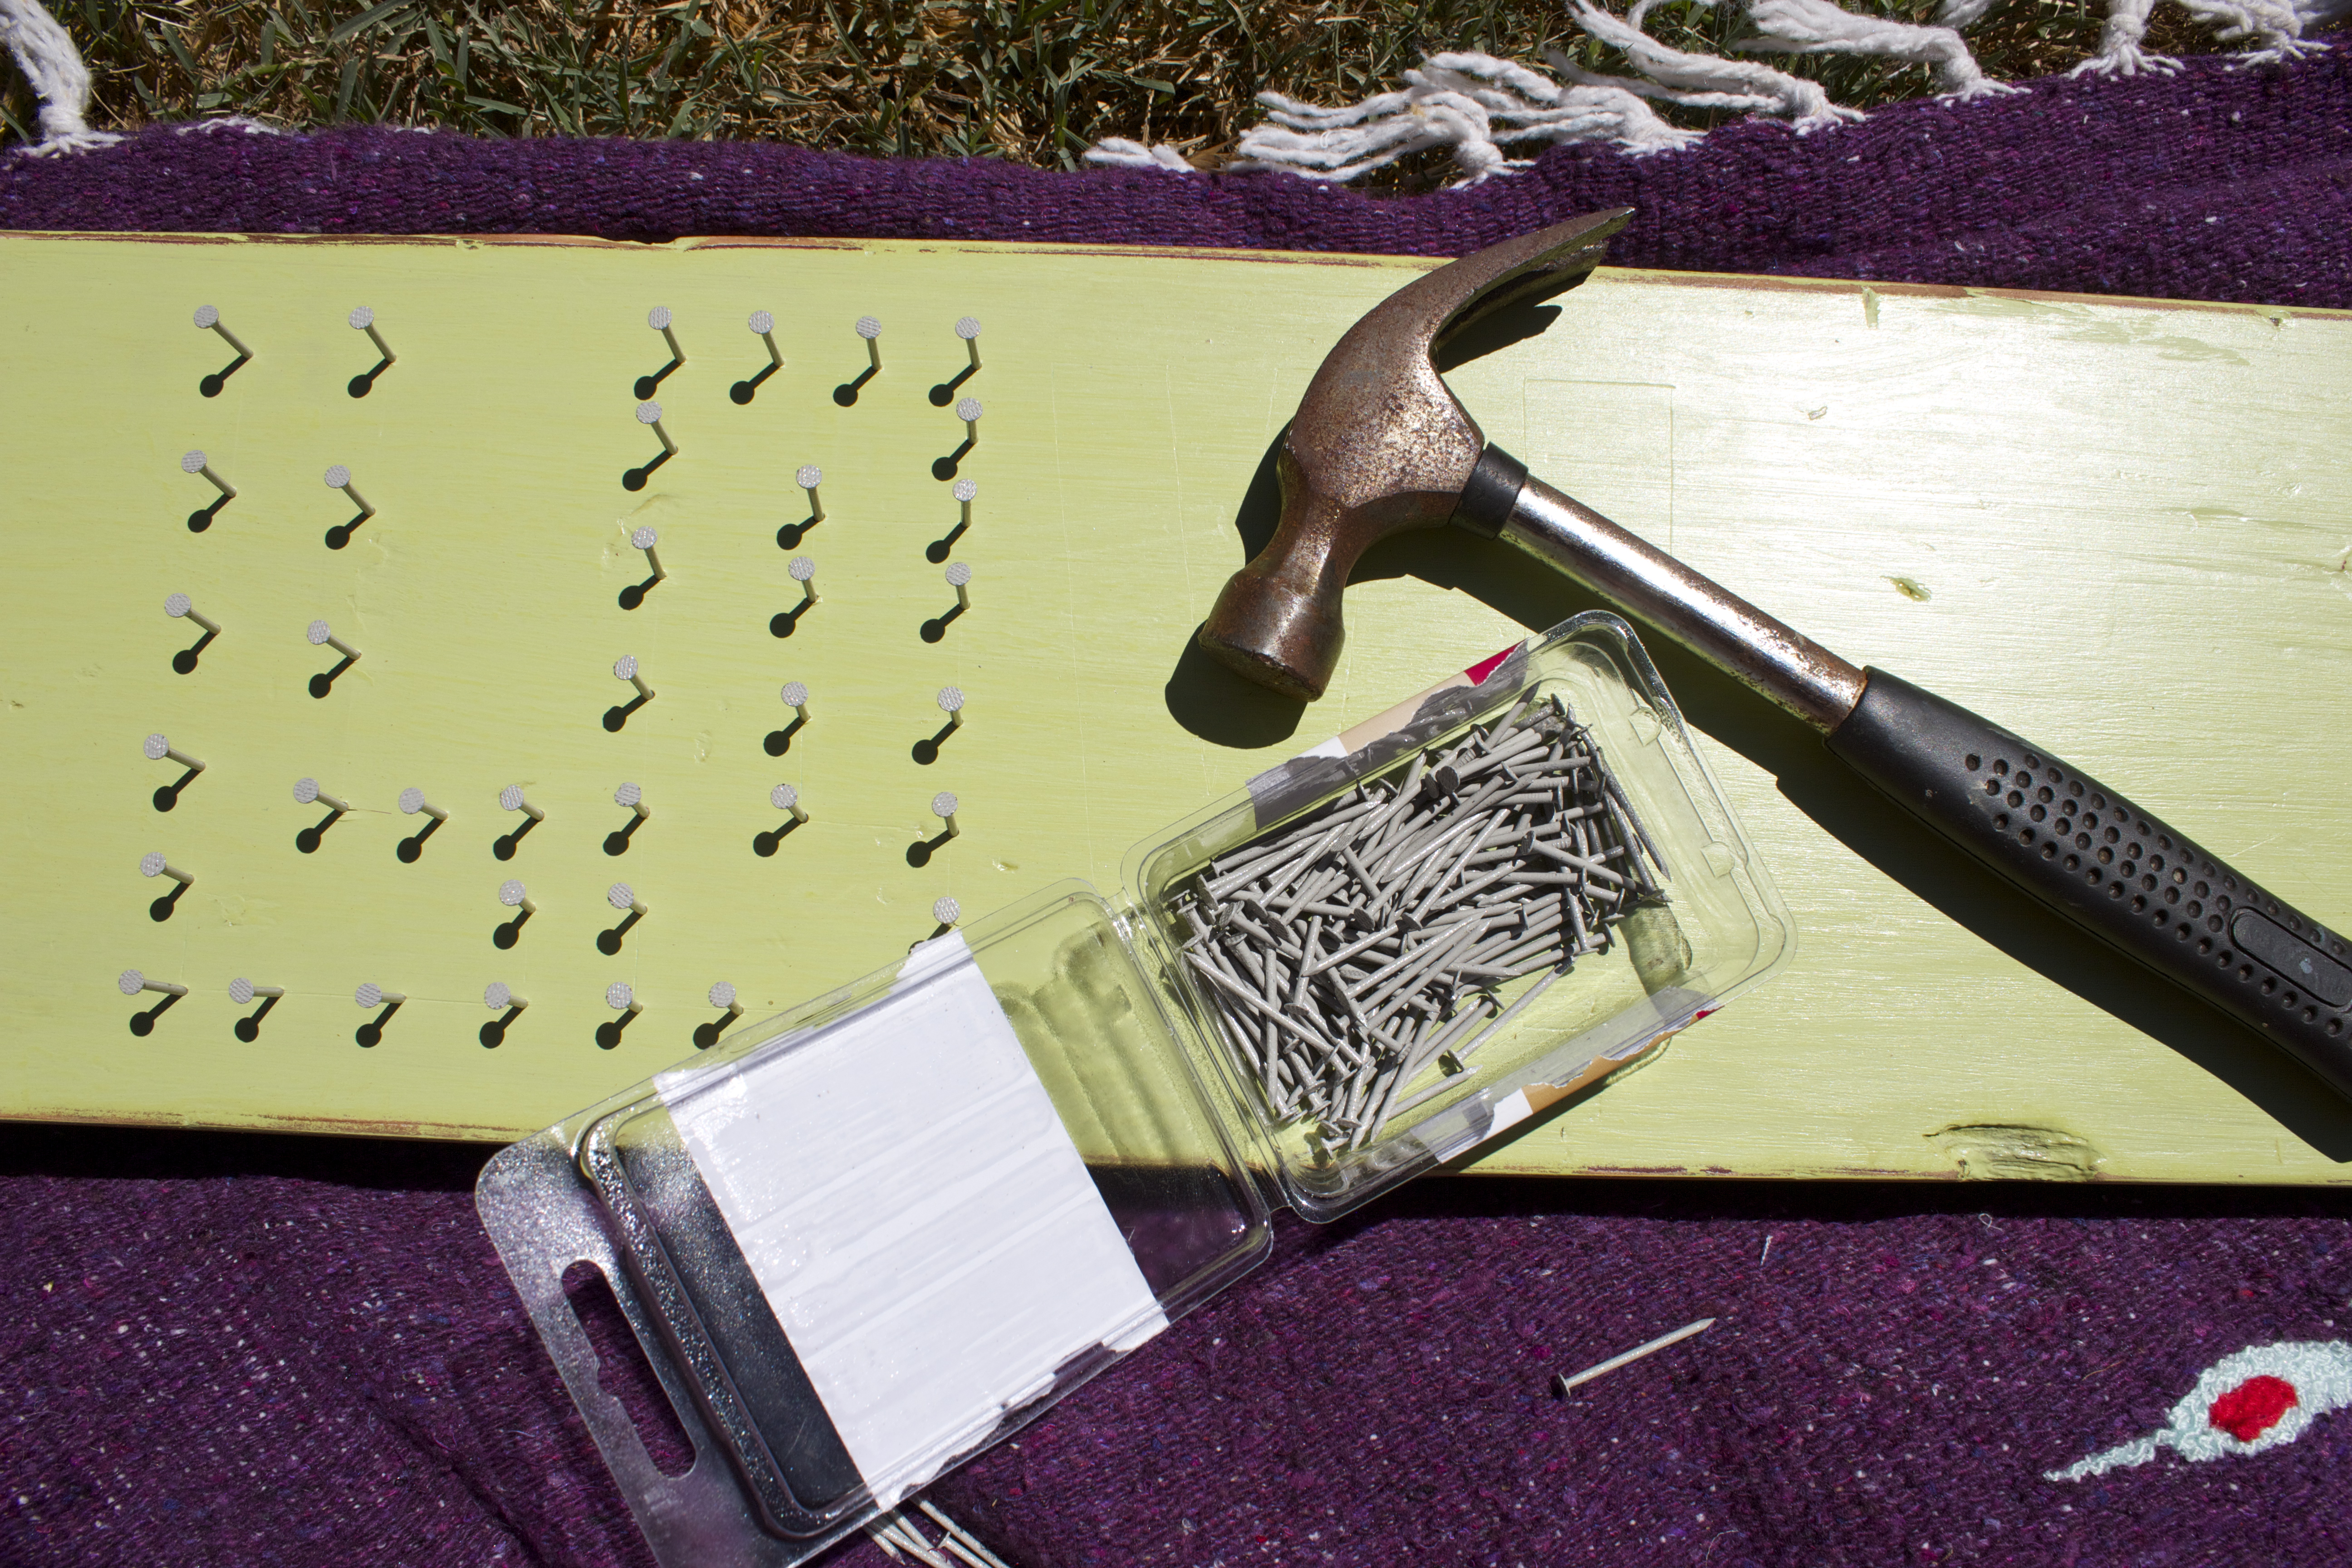
Wood (new or used), paint (if you desire), nails, hammer, string or thin yarn, painters tape, paper, ruler, exacto knife, music and maybe a drink 😉
(I didn’t get a comprehensive photo of all the tools needed – apologies! This one below is the closest…)
Steps (in pictures):
 {wood prep and paint}
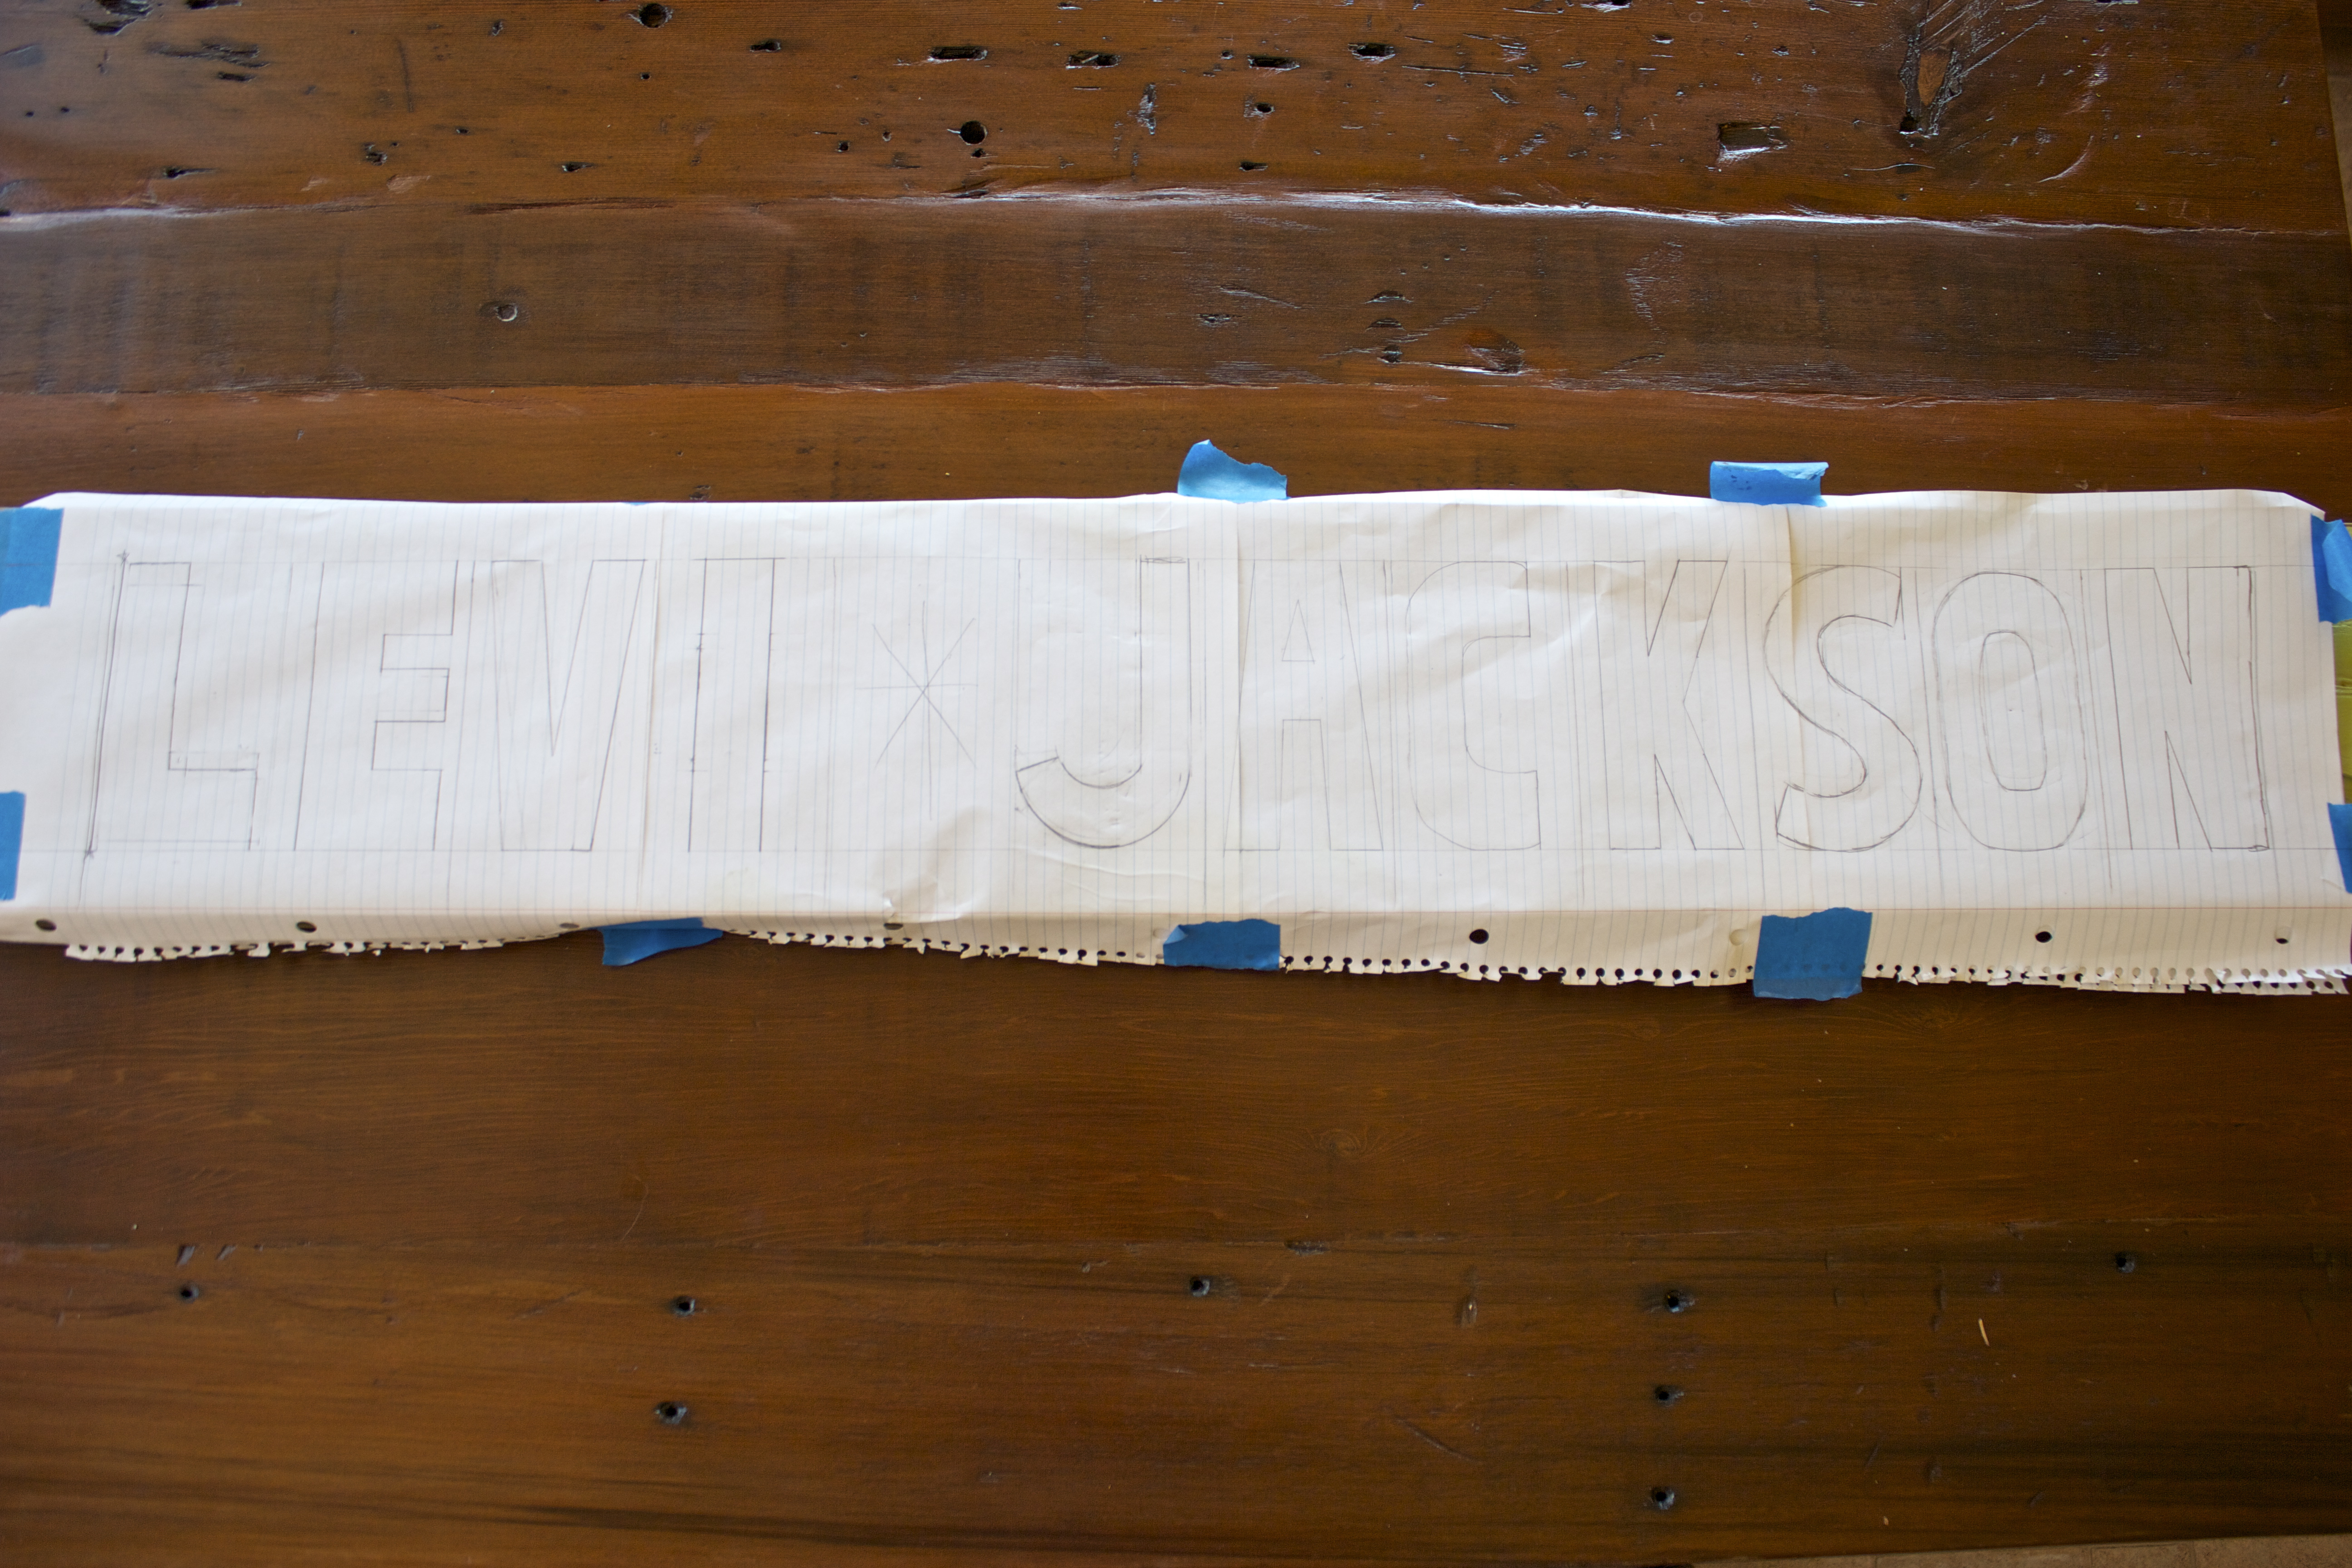 {tape paper to wood – draft of letters}
 {letter cut-out with exacto knife}
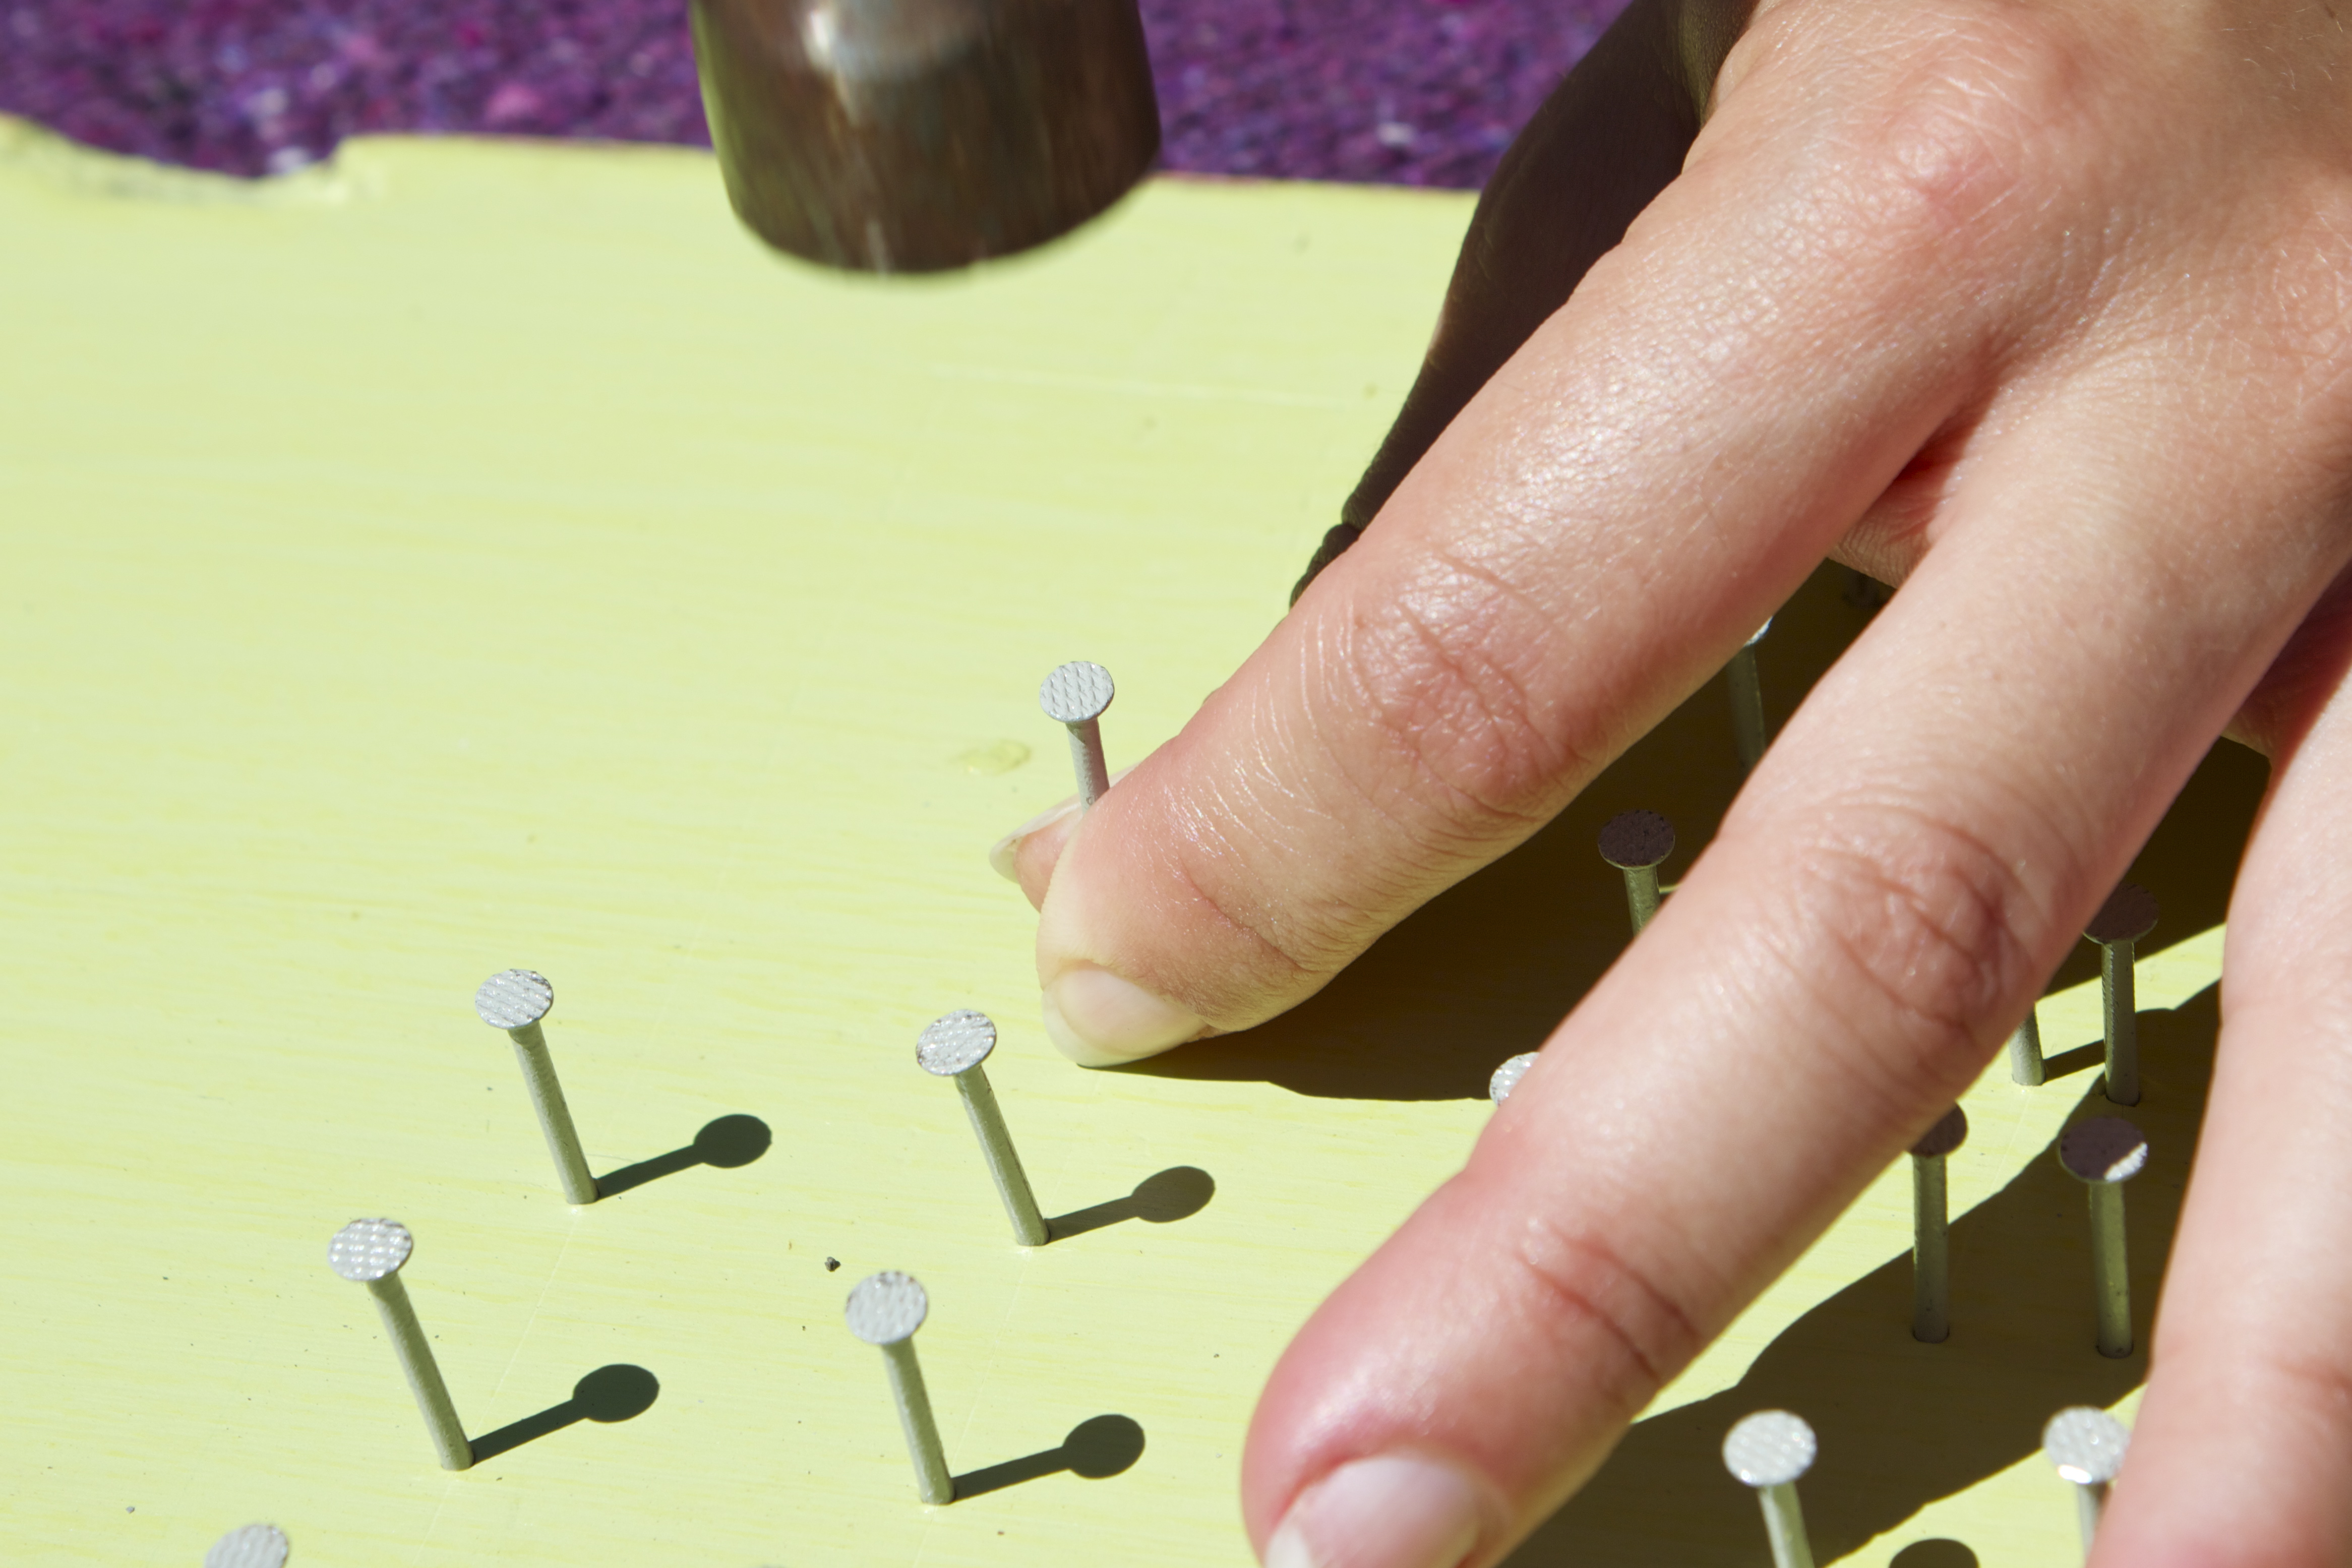
 {hammering of nails along letter lines – or around paper if preferred}

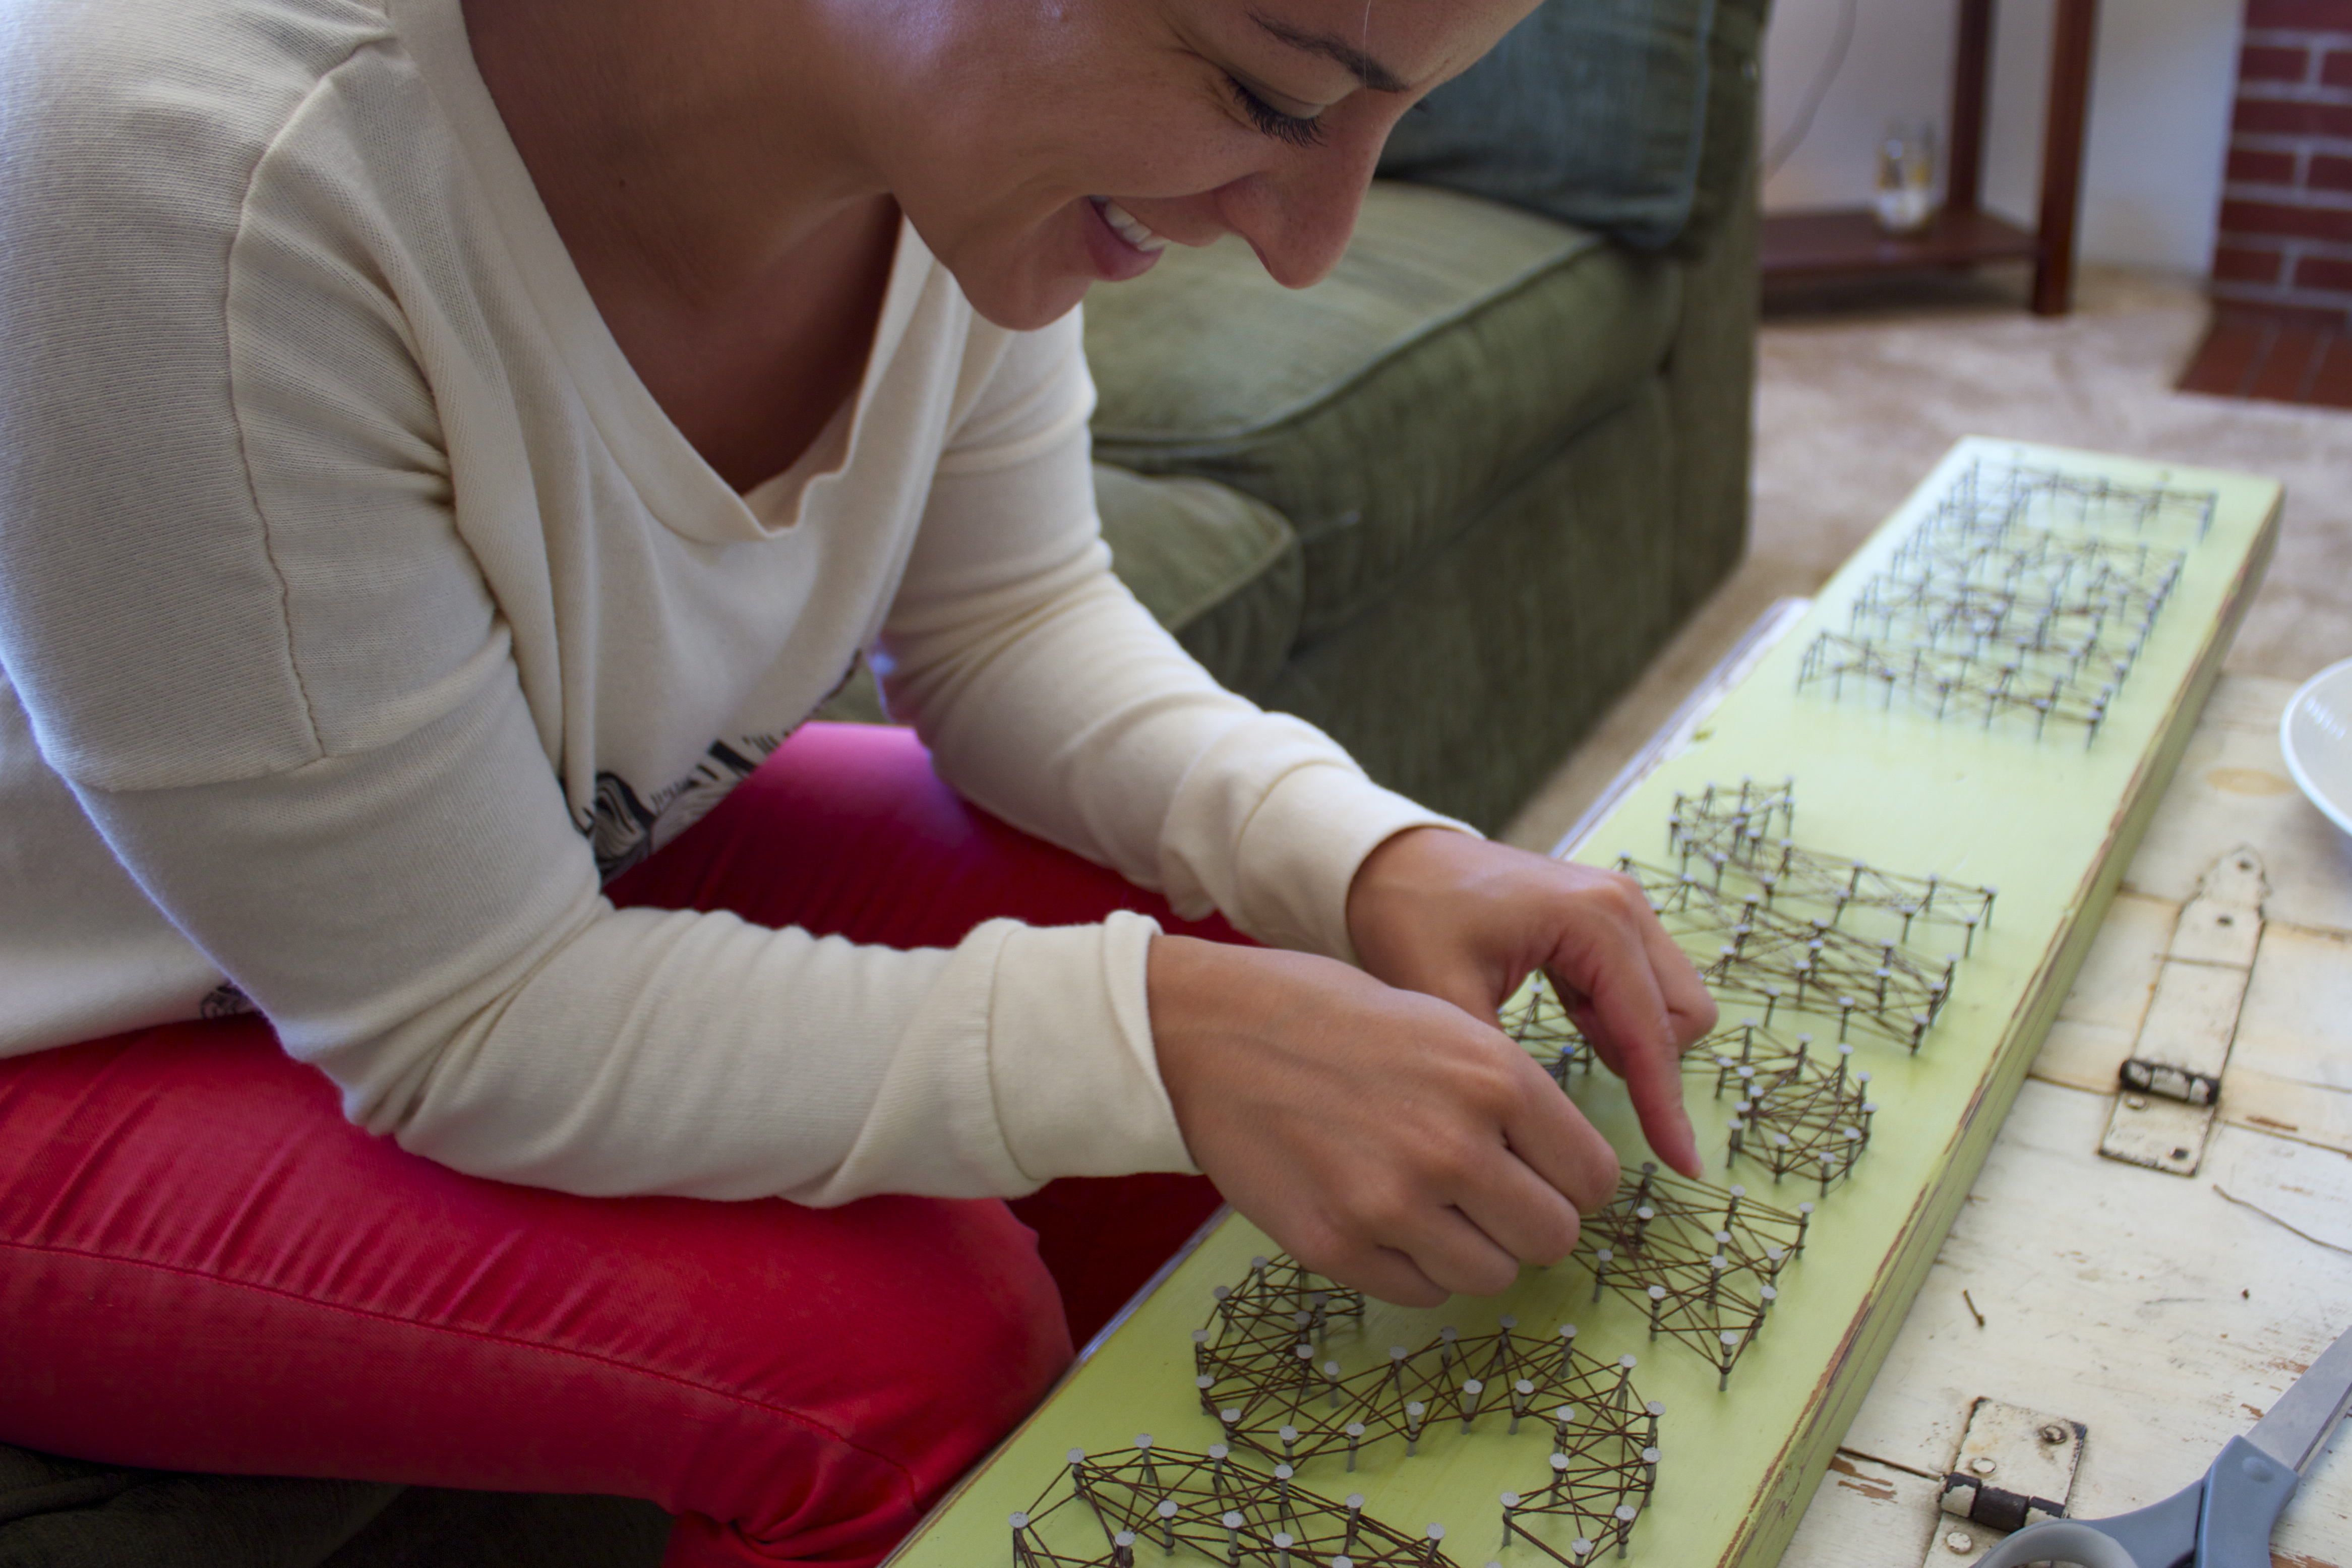 {weaving the string throughout the letter}
Steps:
1.) Prep your wood in terms of size, color, distressing, texturizing, etc. If you don’t have access to tools to personalize your own wood – take a trip to Home Depot where they will be more than willing to help you pick out the right kind of wood, cut it in the size you want and probably even help you find the tools for sanding and texturizing, shall you wish
2.) Using painters tape, tape any type of paper (I simply used notebook paper) over the wood on the edges
3.) With a pencil (so you can erase) draw out the letters of what you wish to write on the paper. This is where a ruler will come in handy – try to keep the letters all the same height and width for uniformity. Keep the distance equal from the first letter and the last letter to both ends.
4.) After you are satisfied with the letters, use an exacto knife to ‘cut out’ the letters. And actually, I quickly realized it’s kind of nice to dig a little into the wood during this process, as then you can fully remove the paper and hammer the nails along the line markings of the knife. Be sure to make a deep enough cut that you are able to see the lines…otherwise you may lose track of the letters.
5.) Start hammering your nails along the letter lines – I space each nail about 1/2 inch apart and make sure to make the height of each nail as consistently even as possible. I like to set my hand on top to feel which nails are sticking out higher – the ruler also works well for this!
6.) After you’ve hammered all the nails in – take an end of the string and start on a corner nail of one letter (you will do one letter at a time – don’t have the string connect from letter to letter). Tie a secure knot to the corner nail – don’t worry about leaving an extra tail of string because you can easily just snip it off! After the string knot is secure – start weaving the string between the nails. There is no rhyme or reason to this part – just make sure that it’s full in all areas and you ‘outline’ the letter to retain the shape of it.
**I like to start lower on the nail and work up to the top of it so the string creates more of a 3-D effect. Also, I like a full effect of string – especially because this string is so thin, it was important to do a lot of layers to create a full look and help make the letters pop!
Have fun with your own String Art designs and projects! 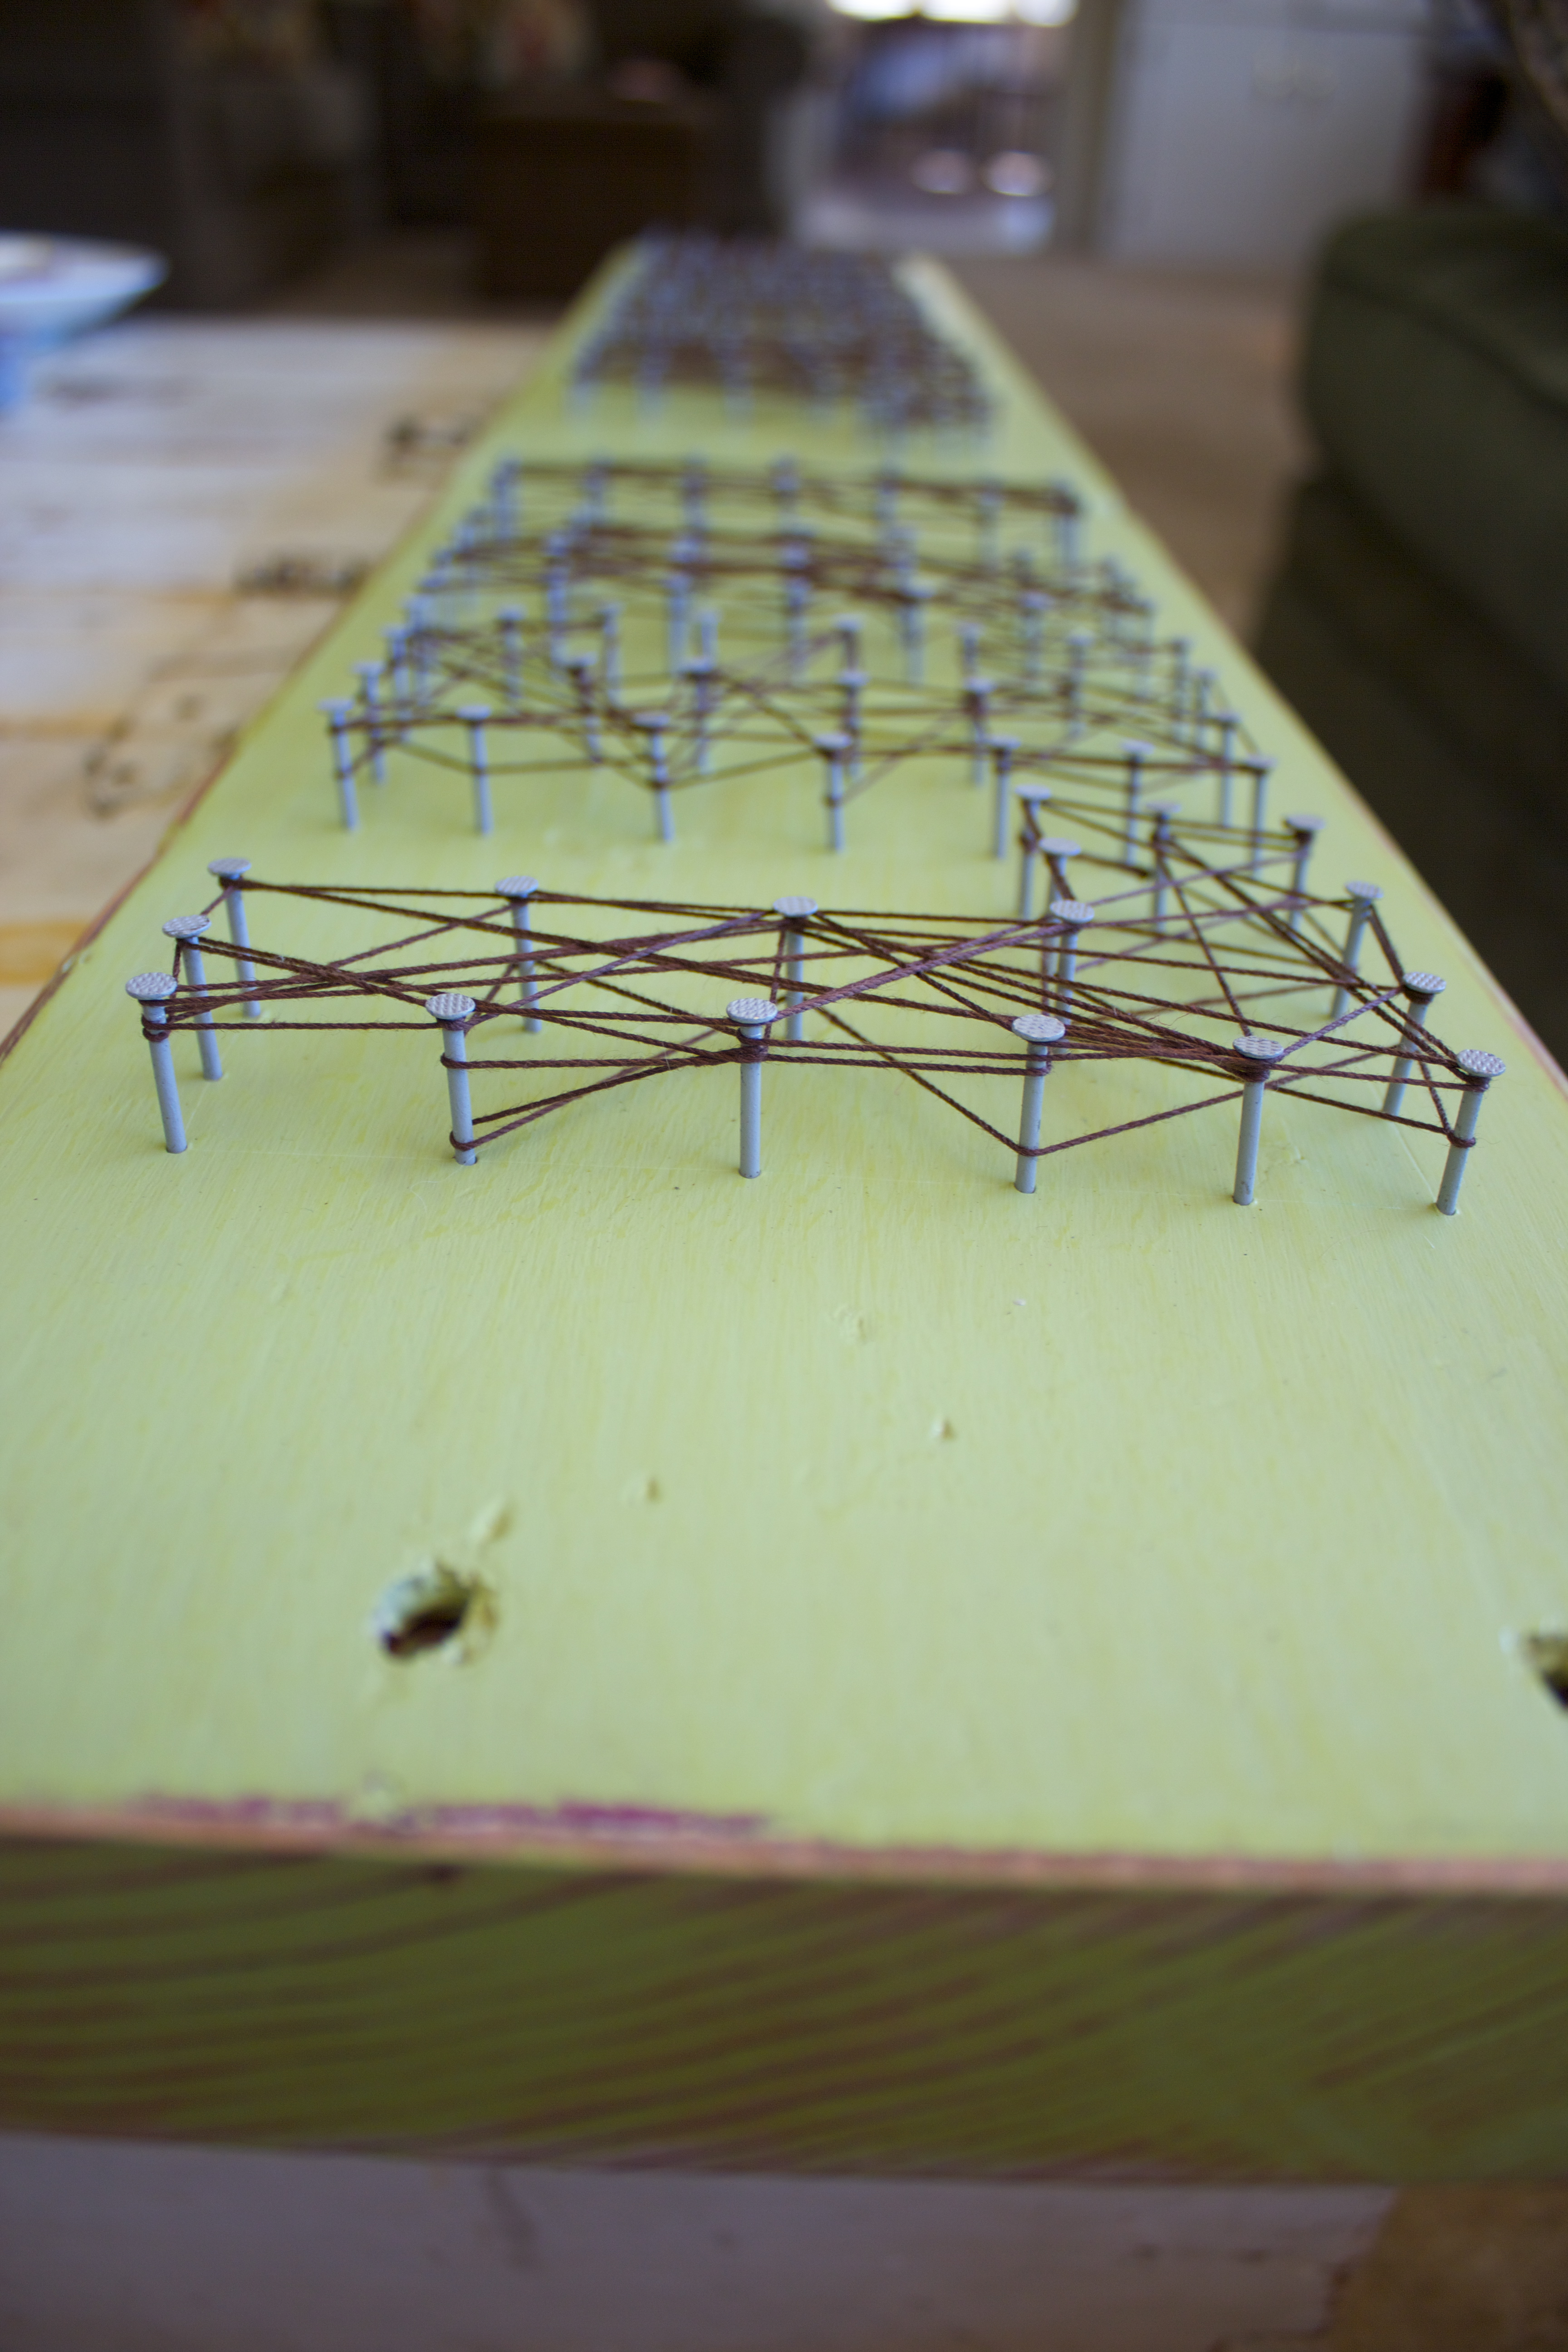
 Cheers!
-L

We love and adore this art piece and cannot wait to hang in his new room!!!!
Can’t wait to see it in the new home! Yay!