
‘Tis the Season! Although I love it, I cannot believe it’s already here. The second half of this year has flown by, I tell ya. So, now that we are almost to December, why don’t you say we get a head start on some Christmas Crafts!
I was inspired to make these ornaments from some that I found at a local gift shop. These ornaments were quite festive but in a non-traditional, bohemian-esque way – just my style. They stole my little heart and inspired me like no other! Here’s the How-To…


Items you’ll need:
- Bare glass ornaments – I got traditional round balls, and ‘onion’ shaped smaller ones,
- Glass Glitter and Tinsel Glitter
- Yarn – thick
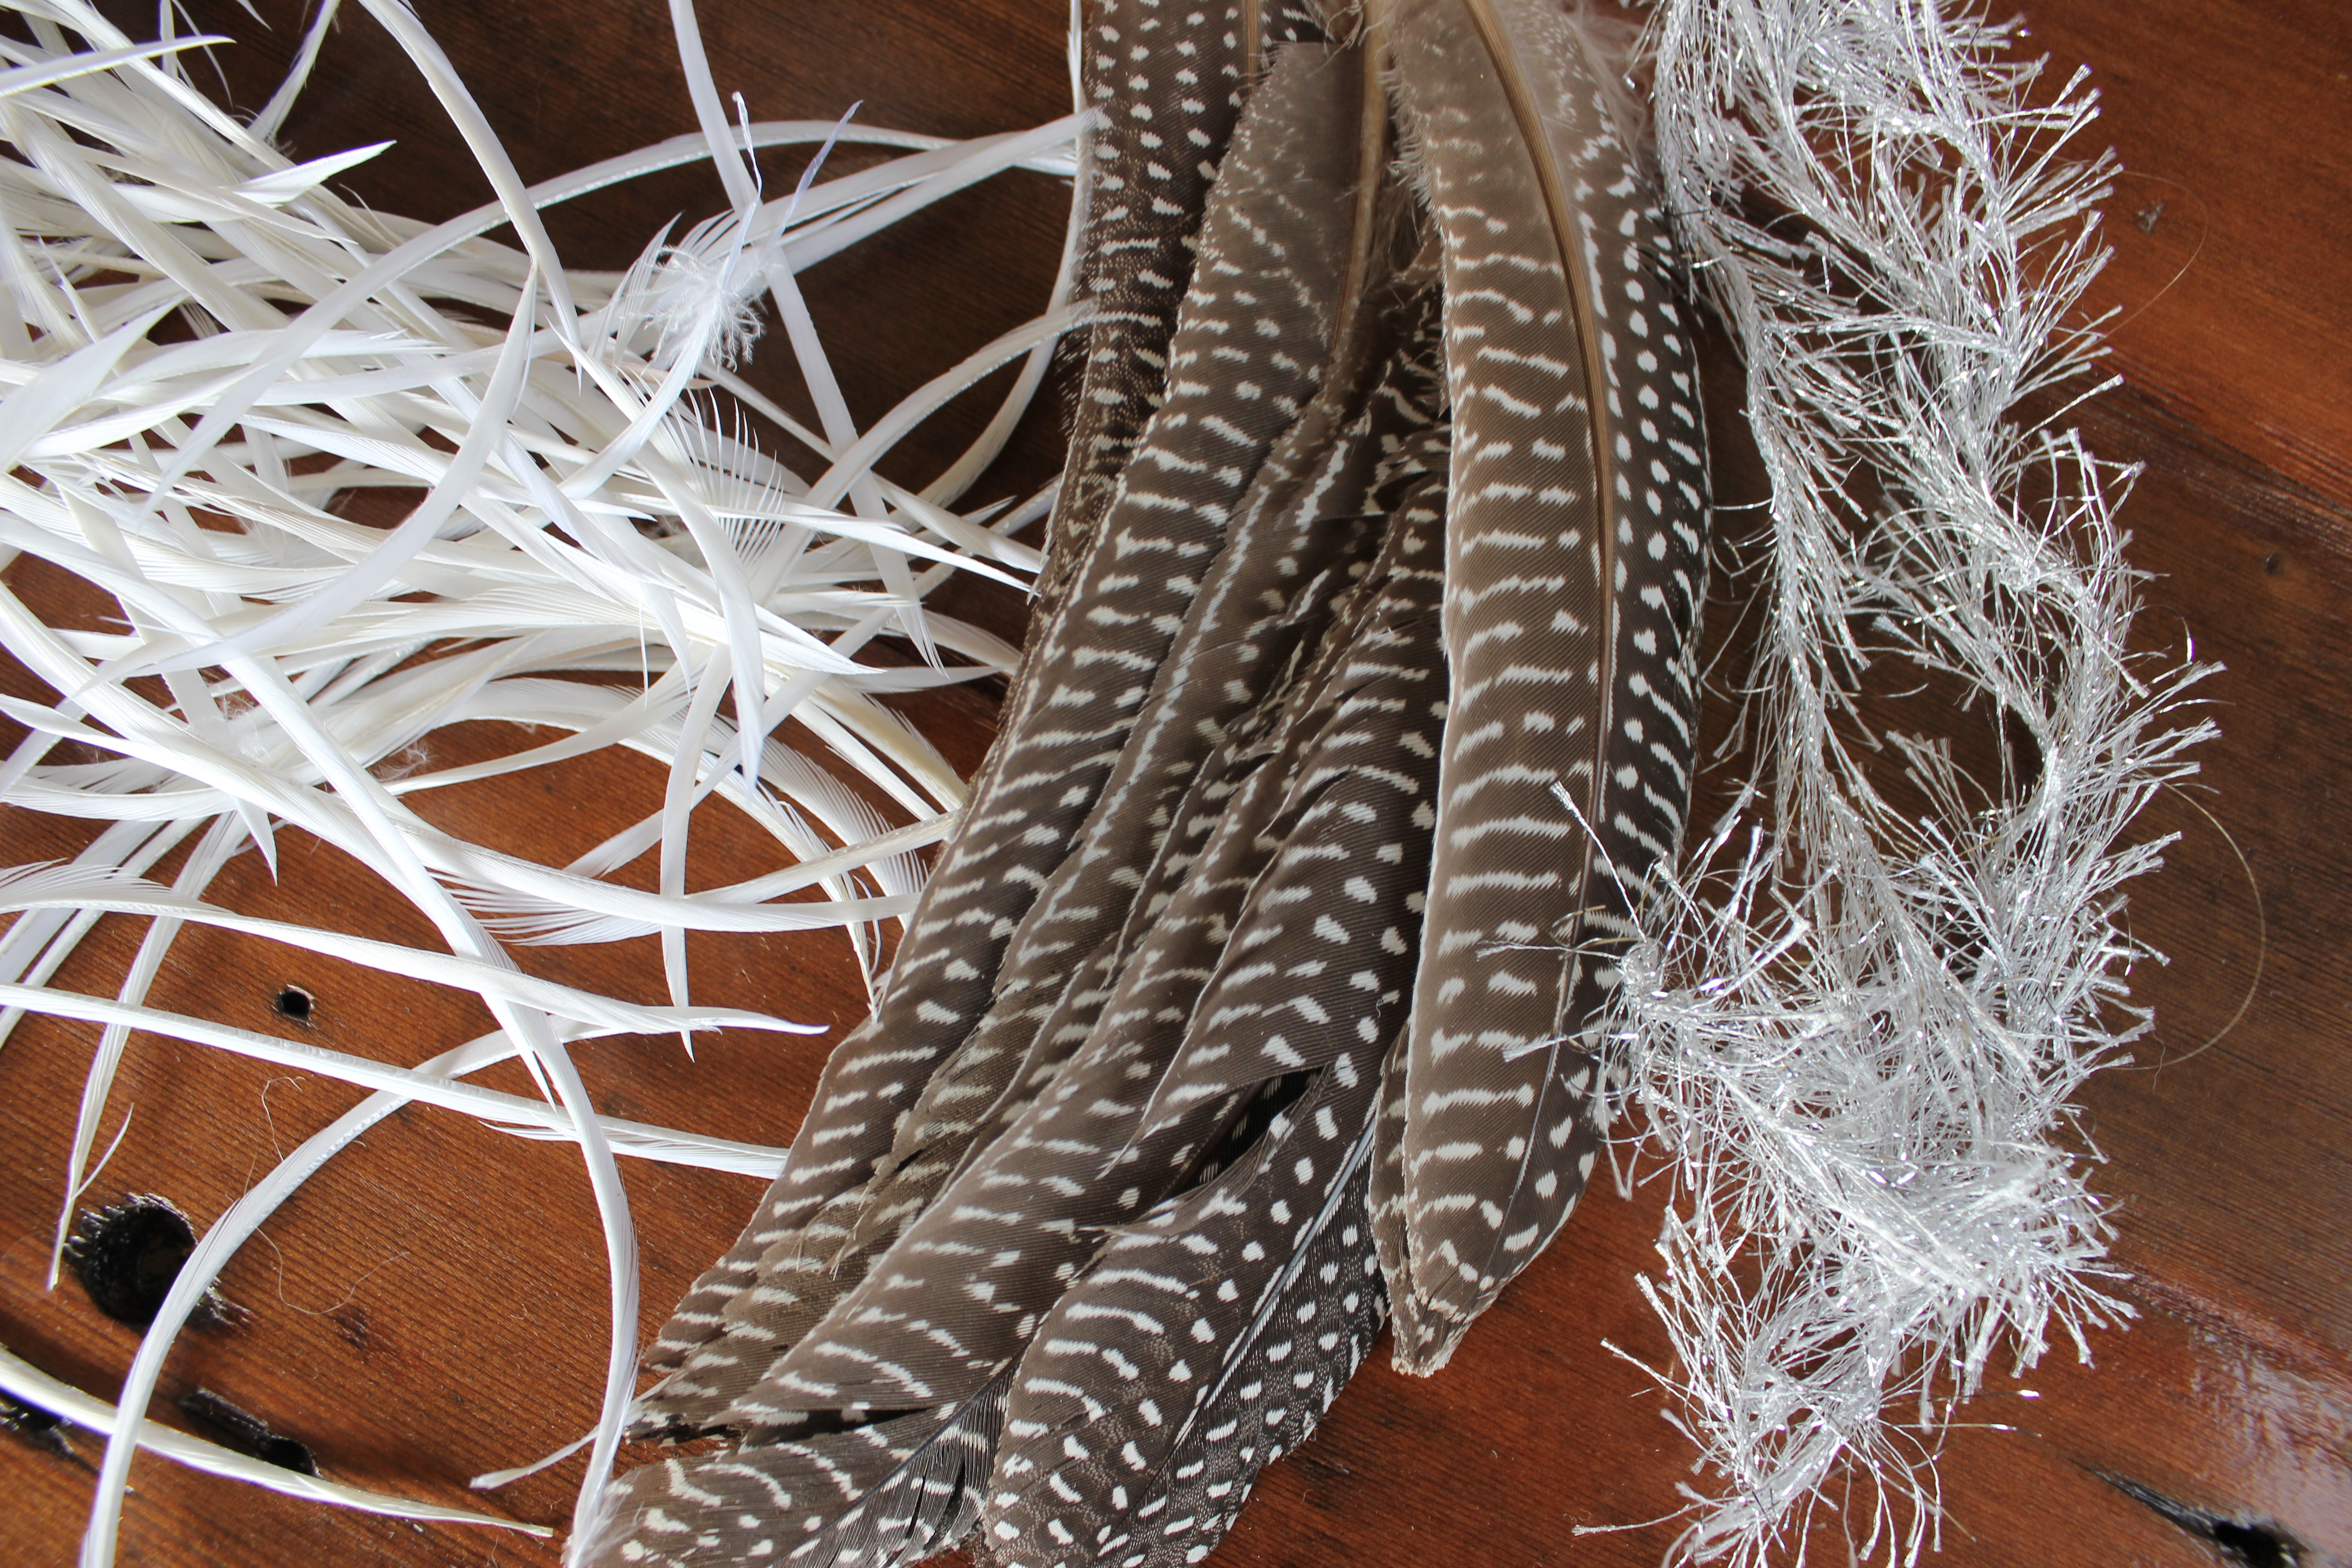
- Feathers from here (I used Guinea Hen Quill, Stripped Goose Biots Dyed White)
- Raffia
- Glue Gun
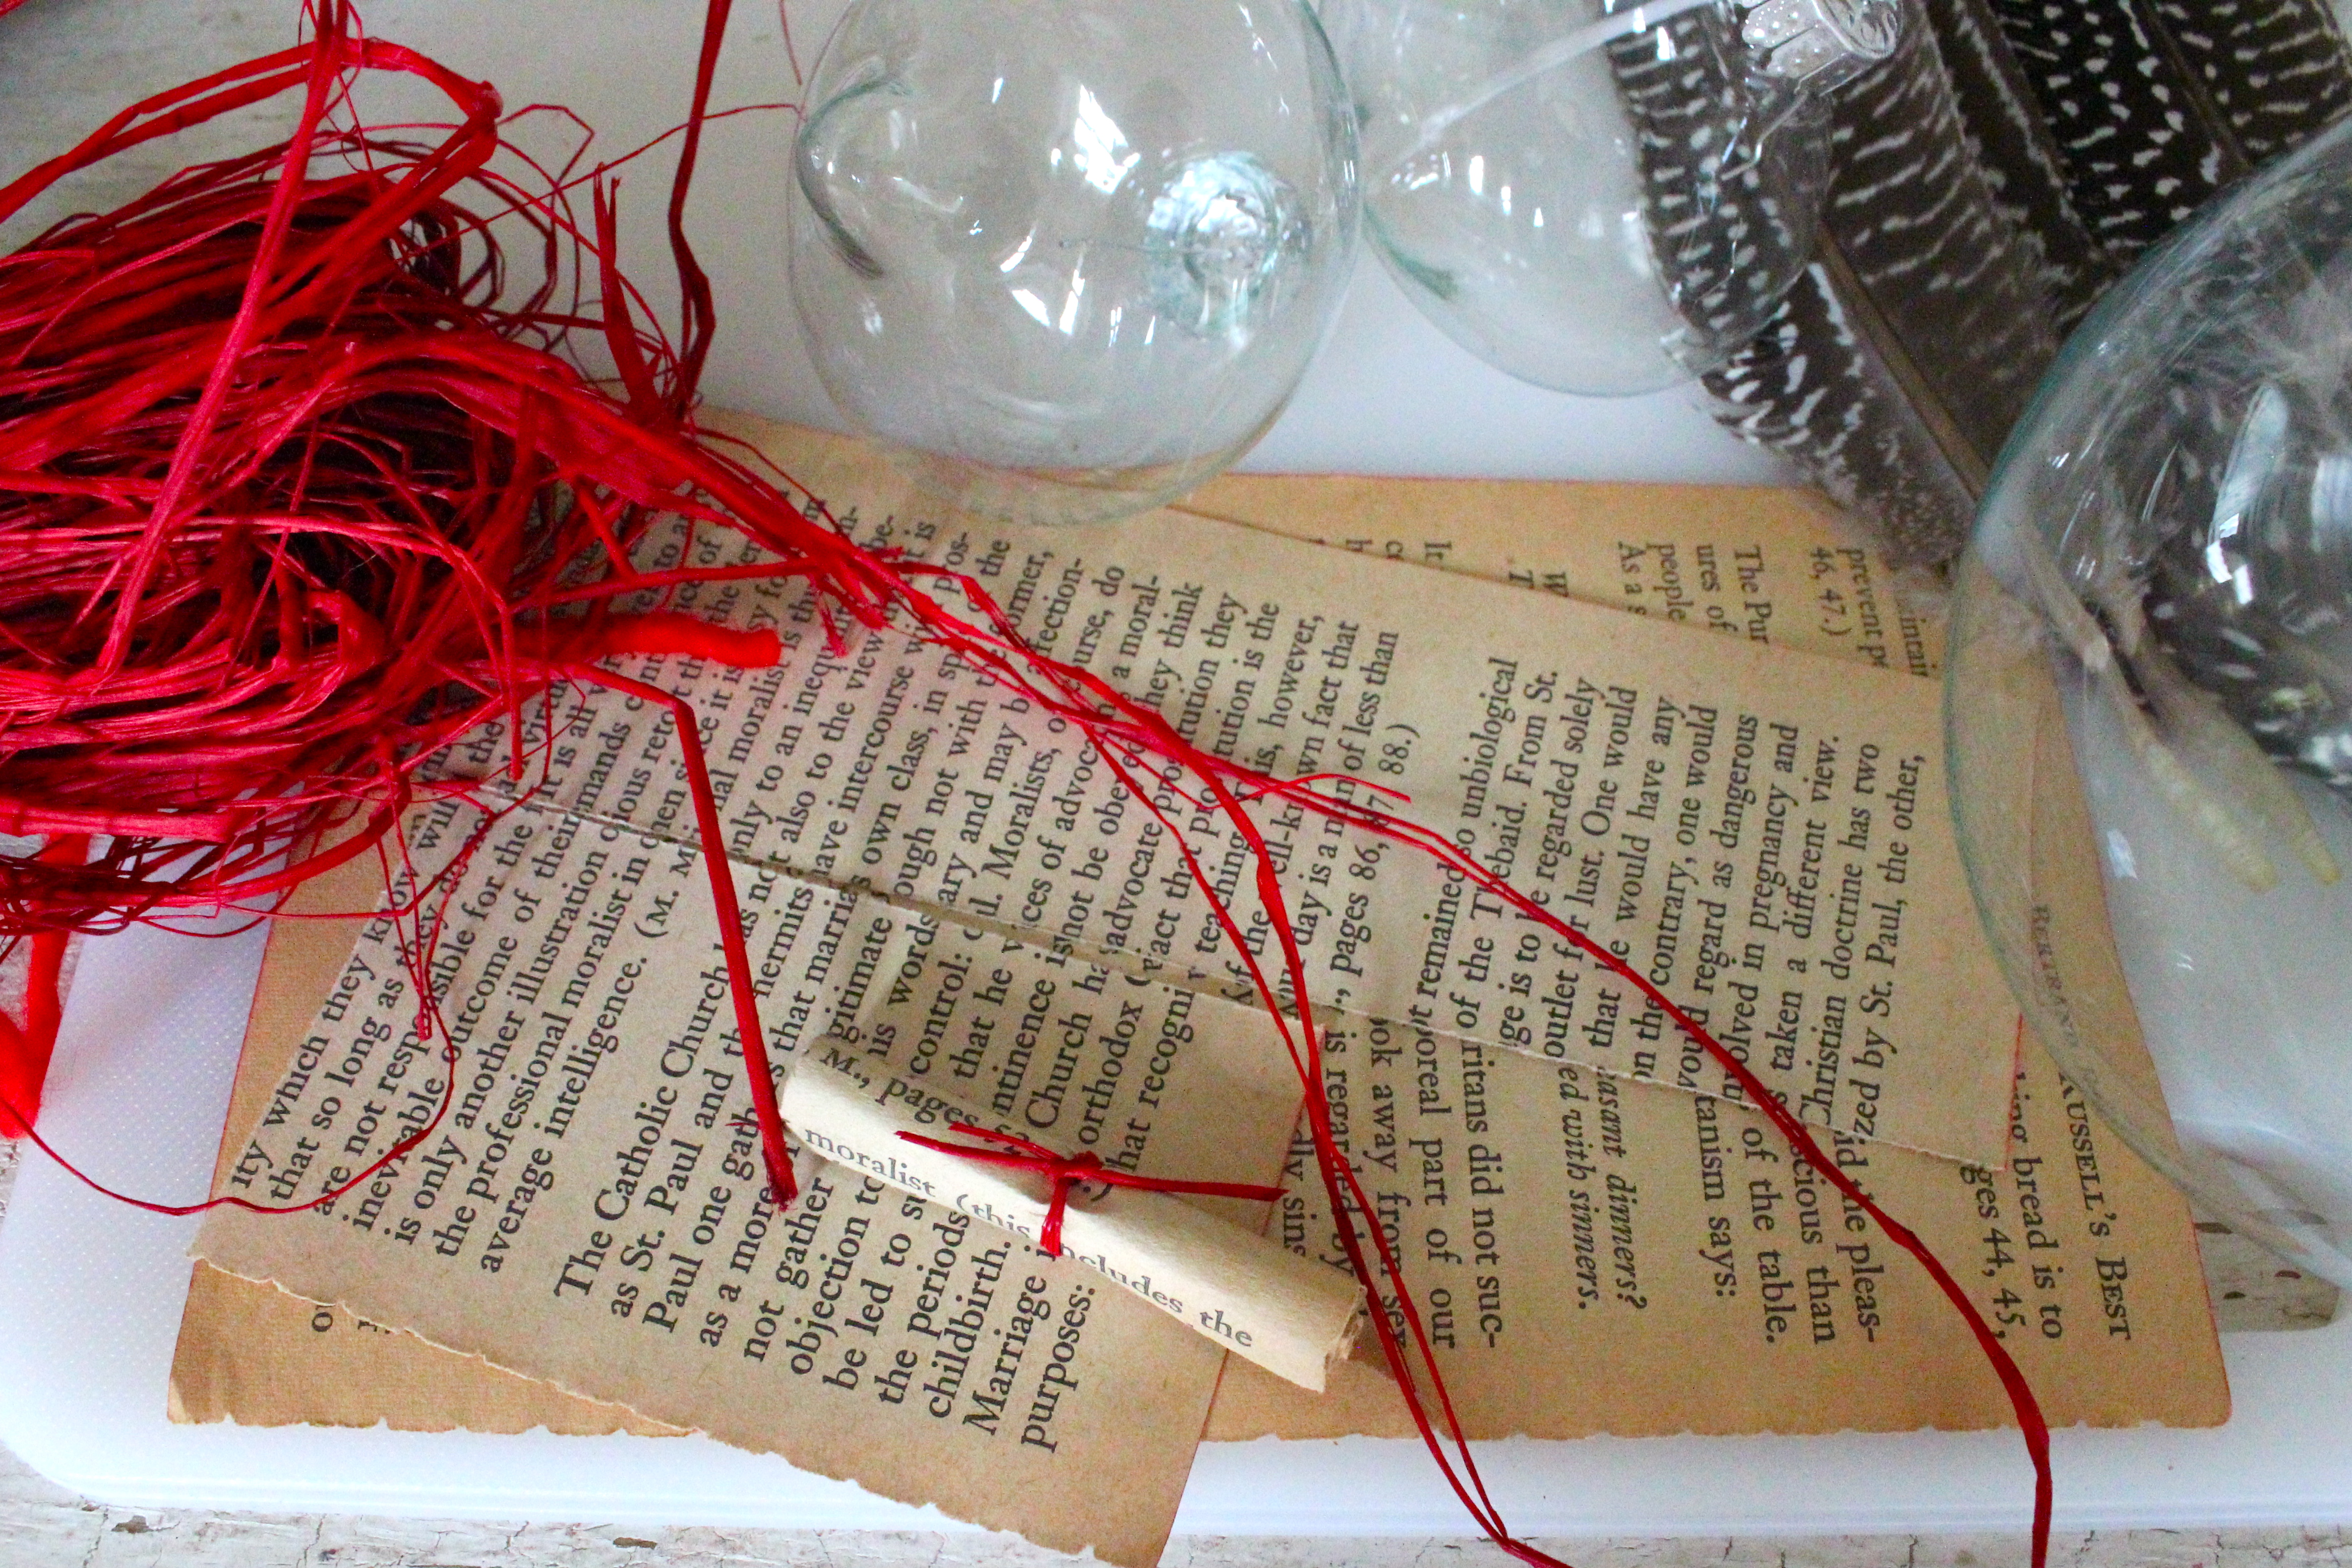
- Old Book Pages
- Silver Tinsel
The first type of ornament uses the old book pages, raffia, tinsel glitter and a round ornament.

Steps:
- Fold book pages lengthwise and then again width-wise. You get rectangular pieces perfect for rolling into scrolls.
- Roll the paper into a mini scroll and secure with red raffia.
- Make two more at this size. Then make another by folding a book page horizontally and creating a scroll at this width.
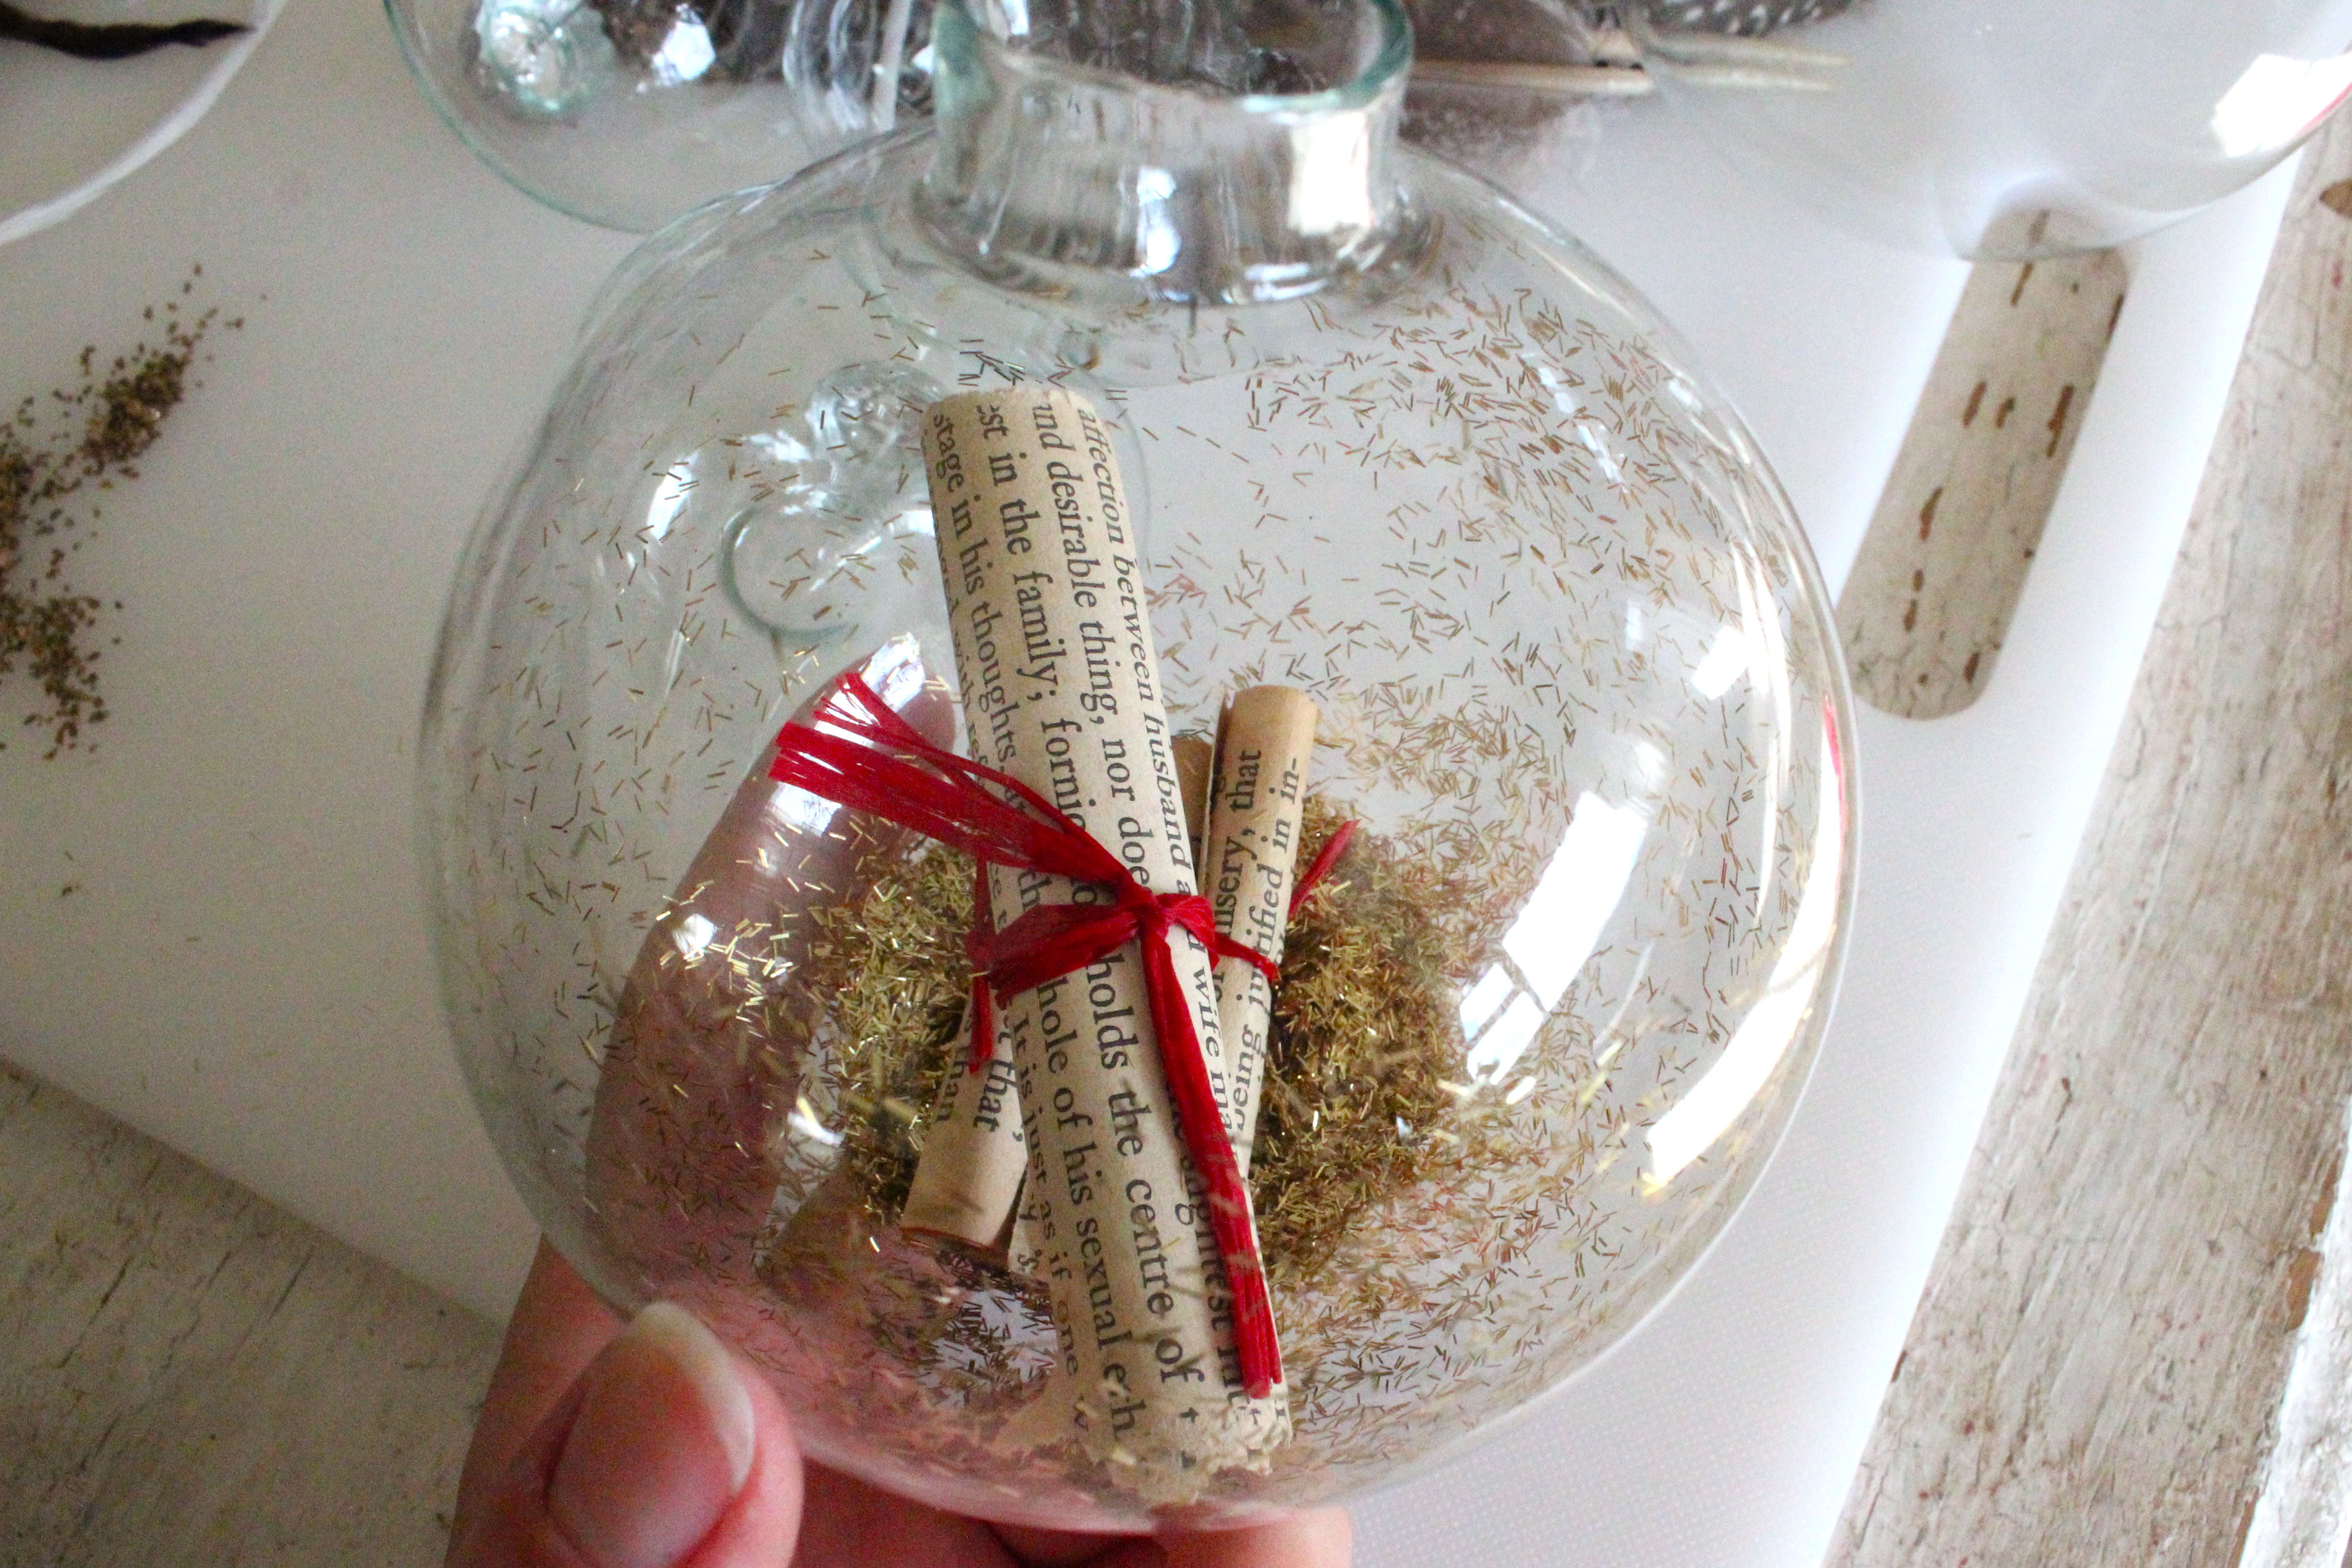
- After completing these scrolls, put them into the ornament.
- Pour the tinsel glitter (about 1 tablespoon – or more depending on the look you want) into the ornament and shake with your finger covering the opening. The tinsel glitter will lightly stick to the sides of the ornament.
- After putting on the top, hot glue around the lid and place scraps of the book pages around the lid, completing this look and ornament!
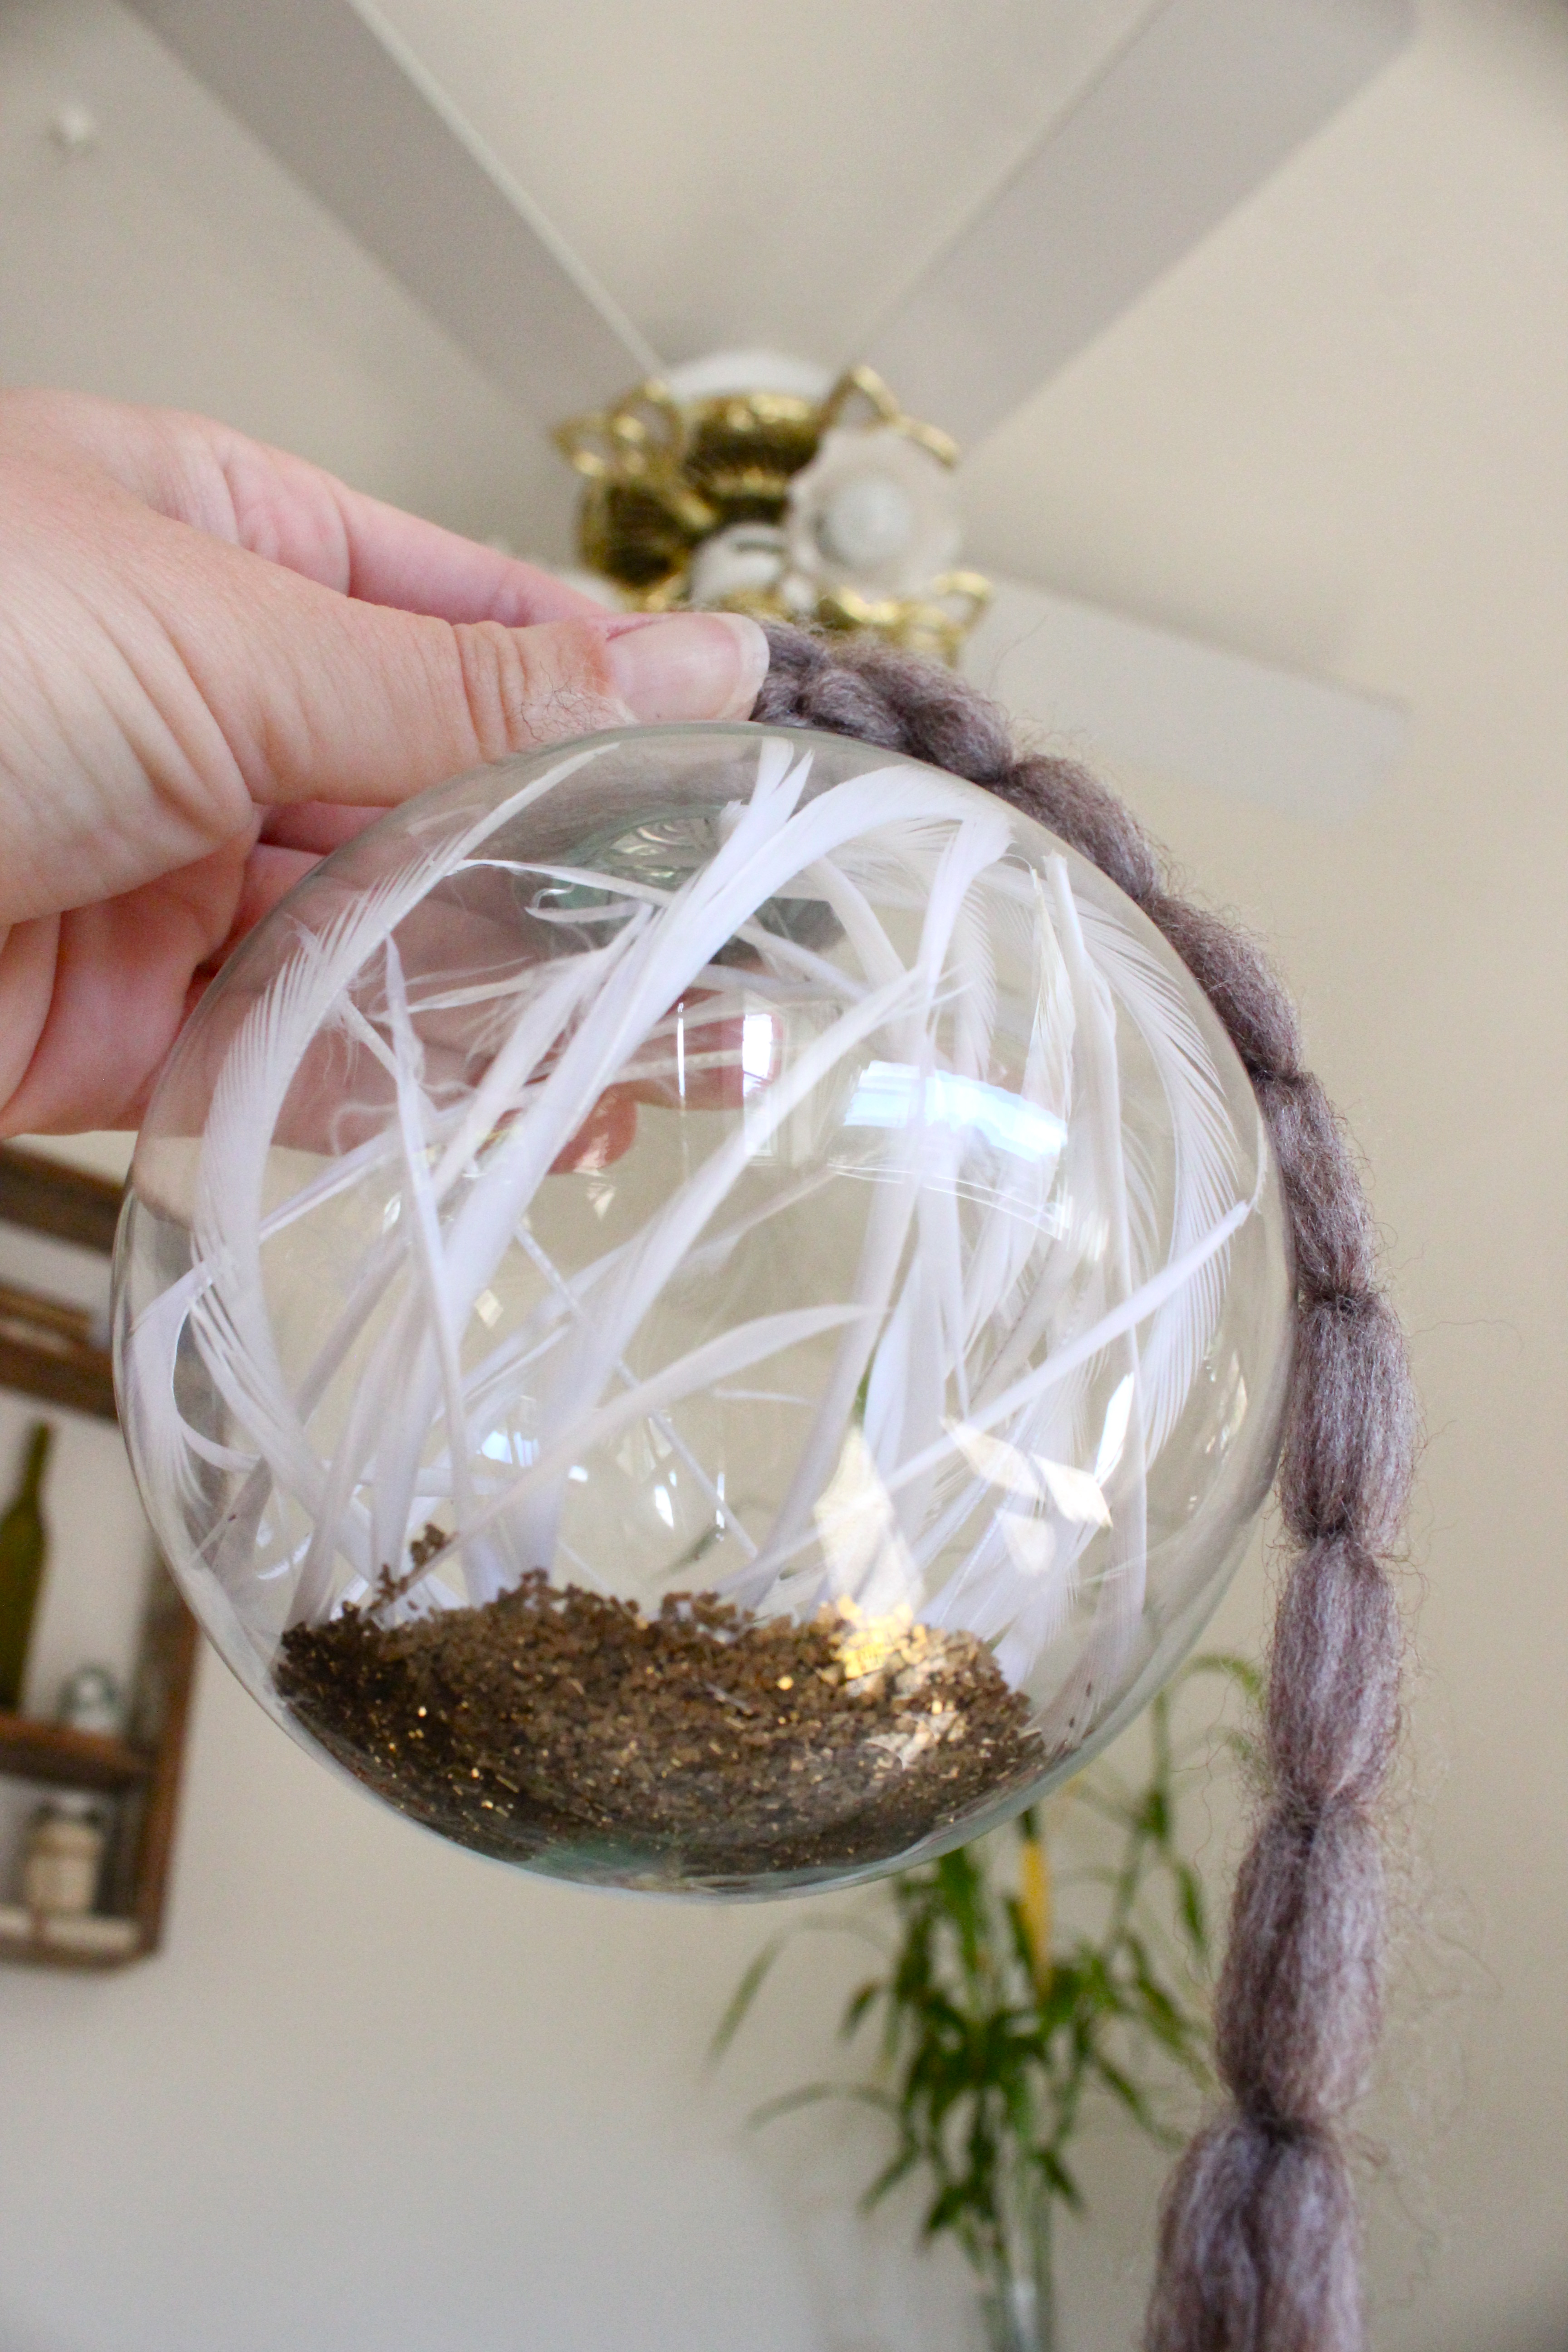
For the next type of ornament, you’ll need the goose biot feathers, glass glitter and yarn


Steps:
- Start by inserting the goose feathers into a round ornament. Luckily these feathers perfectly form to the round inside of the ornament. Makes it so easy!
- Pour the glass glitter into the ornament. I like this glitter because unlike the tinsel glitter, it won’t stick to the sides at all. It will fall to the bottom and stay.
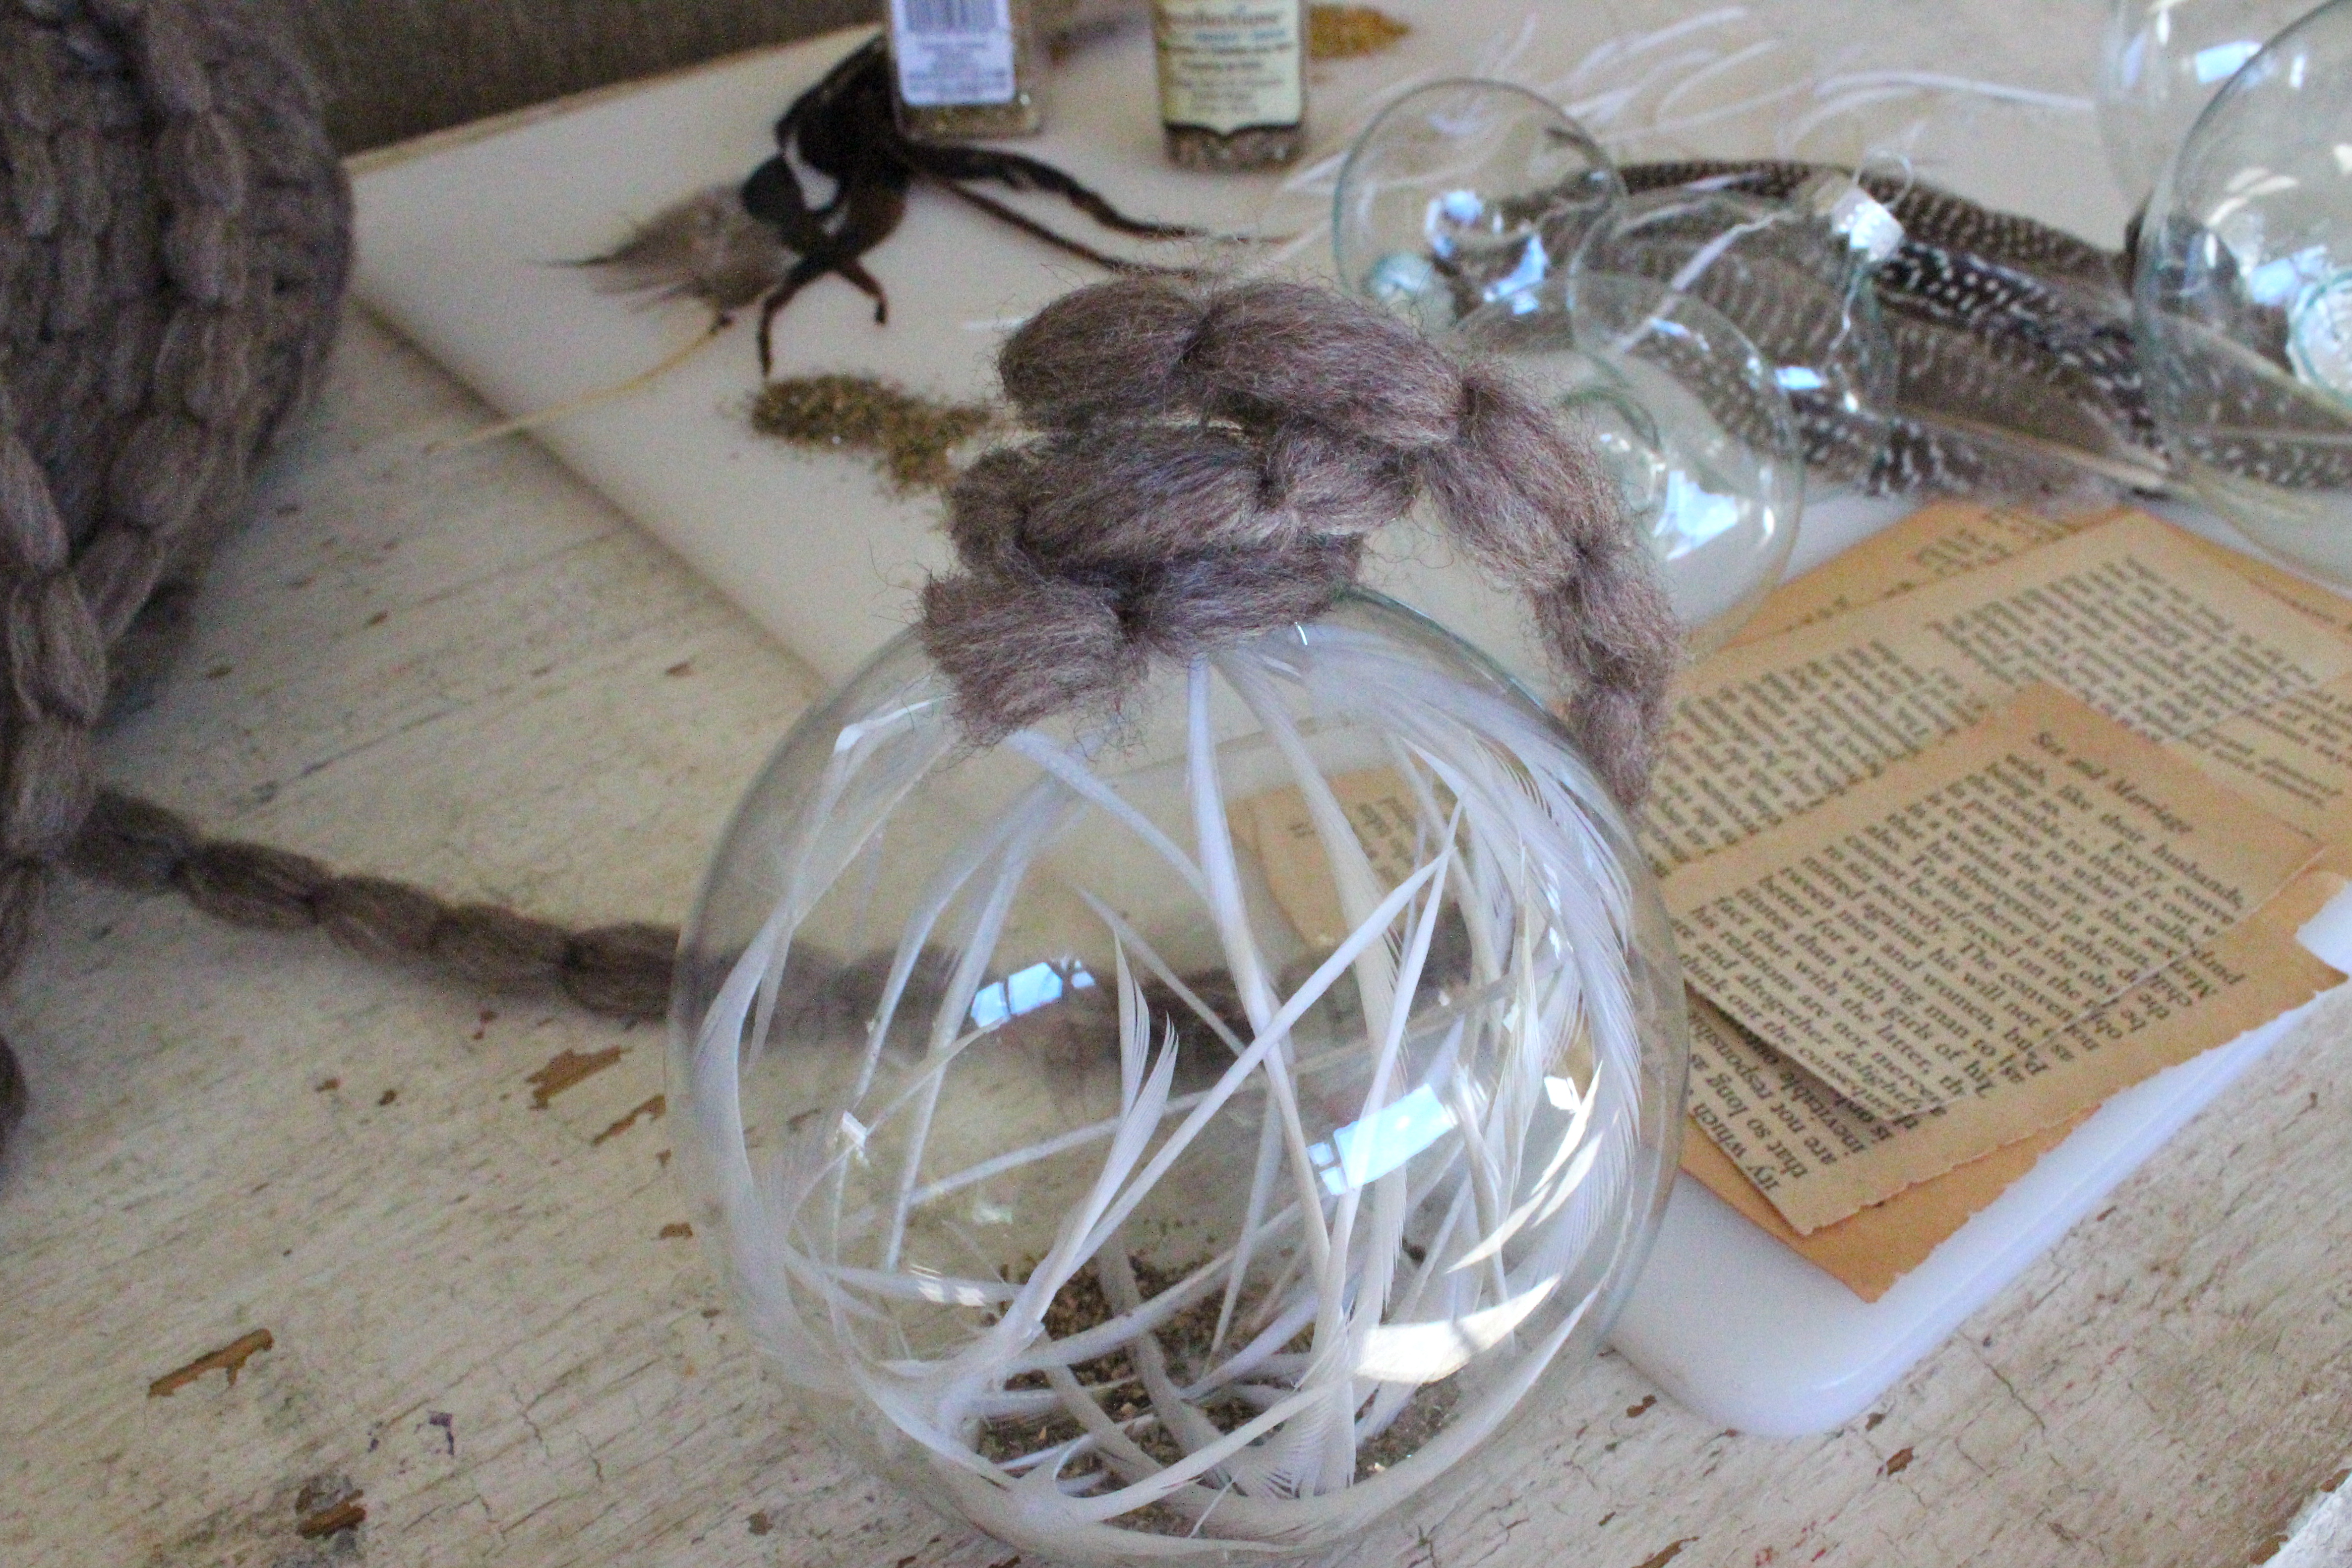
- Put the cap on and start hot gluing around the base of the lid. Lay the yarn (cut about a 2 foot piece) over the glue and continue this until the lid is covered except the top of the hanging loop.
- Pull the yarn through the hanging loop
- From the top of the lid, measure about 5 inches up and have enough yarn to fold over about two to three times. After this, tie into a knot in the middle and you have your hanger for this ornament.
For the third type of ornament, you’ll use the goose feathers and the guinea hen quill feathers


Steps:
- First insert the Guinea Hen Quill feather. You will have to bend the feather two inches from the bottom end in order for it to fit and form inside the ornament.
- Slowly feed it into the round ornament.
- Do the same with one more guinea hen quill feather
- After those two are placed, you can start popping in the goose feathers. Add until satisfied.
Here are some other ornament styles I made:
Silver Tinsel and Gold Tinsel Glitter in an Onion Bulb


Another scroll with bits of paper and raffia in an onion bulb

Goose feathers, glass glitter and feather top
Happy ornament making, everyone! But first, have a very happy and fulfilling Thanksgiving!!
Cheers!
L

Pingback: Little Christmas Details | Bloom & Birch
Pingback: Christmas Candles DIY | Bloom & Birch
Very talented young lady. Beautiful!
Thank you @Church!